
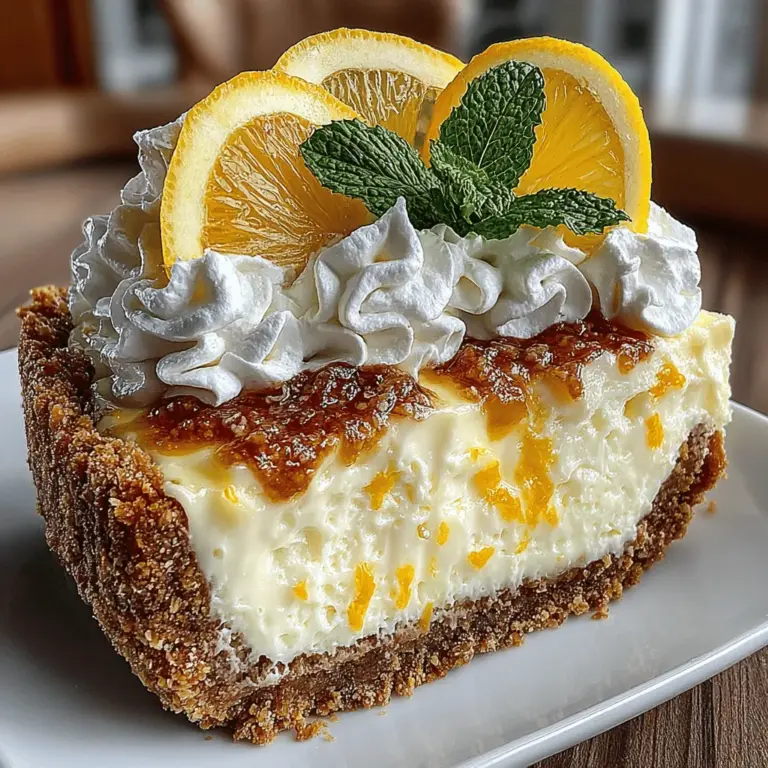
Zesty No-Bake Lemon Dream Pie: A Refreshing Delight for Every Occasion
As the temperature rises and the days grow longer, there’s nothing quite like a refreshing dessert to cool you down and satisfy your sweet tooth. No-bake desserts have emerged as a favorite among home bakers and dessert enthusiasts alike, and for good reason. They are not only simple to prepare, but they also deliver a delightful taste that is perfect for any gathering. Among these delightful treats is the Zesty No-Bake Lemon Dream Pie, an ideal choice for warm weather, family barbecues, or special celebrations. Its creamy texture and vibrant flavor make it a standout dessert that lemon lovers will adore.
The Allure of No-Bake Desserts
No-bake desserts are exactly what they sound like—sweet treats that require no baking. This makes them an attractive option for those who want to whip up something delicious without the heat of an oven. The rising popularity of no-bake recipes can be attributed to several key factors. First and foremost, they allow for quicker preparation, which is perfect for busy individuals or families. With just a few steps, you can create a stunning dessert that tastes as though it took hours to prepare.
Another significant advantage of no-bake desserts is the minimal heat they require. In warm weather, the last thing anyone wants to do is turn on the oven and heat up the kitchen. No-bake recipes help maintain a comfortable environment while still enabling you to enjoy a decadent treat. Additionally, these recipes cater to all skill levels in the kitchen. Whether you are an experienced baker or a novice just starting out, no-bake desserts offer an approachable way to create something impressive.
The Zesty No-Bake Lemon Dream Pie exemplifies the beauty of no-bake desserts. With its creamy filling and hint of citrus, this pie is both refreshing and satisfying. It’s a dessert that invites you to dive in and enjoy every spoonful without the stress of traditional baking methods.
Ingredients Overview
To create the Zesty No-Bake Lemon Dream Pie, you’ll need a handful of simple yet essential ingredients. Each one plays a critical role in building the pie’s flavor and texture:
– Graham Cracker Crumbs: These crumbs form the base of the pie’s crust, providing a crunchy texture that perfectly complements the creamy filling. Their slightly sweet and buttery flavor adds depth to the overall dessert.
– Unsalted Butter: This ingredient is crucial for binding the crust ingredients together. Unsalted butter enhances the richness of the crust without overpowering the flavors of the pie.
– Granulated Sugar: Used in both the crust and filling, granulated sugar balances the flavors, ensuring that the pie is sweet but not overly so. This sweetness is key to creating a well-rounded dessert.
– Sweetened Condensed Milk: This creamy ingredient is one of the stars of the filling. It not only adds sweetness but also contributes a velvety texture that makes the filling indulgently smooth.
– Freshly Squeezed Lemon Juice: The tartness of fresh lemon juice is what gives the pie its signature zesty flavor. Using freshly squeezed juice ensures a bright and bold flavor that bottled options simply can’t match.
– Lemon Zest: The zest of the lemon enhances the flavor profile and aroma of the pie. It adds a fragrant citrus note that elevates the overall lemon experience.
– Pure Vanilla Extract: Vanilla extract rounds out the flavors in the filling, providing a subtle depth that complements both the lemon and the sweetness.
– Heavy Whipping Cream: Essential for creating a light and fluffy filling, heavy whipping cream is whipped to soft peaks and folded into the mixture, ensuring a delightful texture.
– Powdered Sugar: This ingredient is used to sweeten and stabilize the whipped cream, helping it maintain its form as it is incorporated into the filling.
– Garnish Ingredients: Simple garnishes like lemon slices and fresh mint not only add visual appeal but also enhance the overall flavor experience of the pie.
Step-by-Step Instructions
Preparing the Crust
To kick off your Zesty No-Bake Lemon Dream Pie, you’ll first need to prepare the crust. This step is crucial as it sets the foundation for the entire dessert. Start by gathering your graham cracker crumbs. You can either purchase pre-made crumbs or make your own by crushing whole graham crackers in a food processor. Aim for a fine crumb texture, as this will help create a smooth and cohesive crust.
In a mixing bowl, combine the graham cracker crumbs with granulated sugar and melted unsalted butter. The key here is to ensure that all the crumbs are evenly coated with the butter. This mixture should resemble wet sand and hold together when pressed.
Next, transfer the crumb mixture into a 9-inch pie dish. Using the back of a measuring cup or your fingers, press the mixture firmly and evenly into the bottom and up the sides of the dish. Make sure to pack it tightly to create a sturdy crust that won’t crumble when serving.
Once the crust is prepared, it’s essential to chill it in the refrigerator for at least 30 minutes. Chilling the crust not only helps it firm up but also enhances its texture, making it easier to slice and serve once the pie is complete. While the crust sets, you can move on to preparing the luscious lemon filling that will transform this crust into an unforgettable dessert.
Stay tuned as we venture further into the process of making the filling and assembling the Zesty No-Bake Lemon Dream Pie, ensuring that this delightful dessert becomes a cherished staple in your recipe repertoire.
{{image_2}}
Making the Filling
To create the luscious filling for your Zesty No-Bake Lemon Dream Pie, start by gathering your key ingredients: cream cheese, sweetened condensed milk, fresh lemon juice, and lemon zest. The combination of these elements is essential for achieving that perfect balance of creamy richness and bright citrus flavor.
Mixing Techniques for Optimal Texture
1. Cream the Cheese: In a large mixing bowl, begin by softening the cream cheese. Using a hand mixer or stand mixer, beat the cream cheese on medium speed until it’s smooth and creamy, about 2 minutes. This step is crucial as it eliminates lumps and helps in blending the other ingredients seamlessly.
2. Add Sweetened Condensed Milk: Gradually incorporate the sweetened condensed milk into the softened cream cheese, mixing on low speed to prevent splattering. Be patient and scrape down the sides of the bowl with a spatula to ensure an even blend.
3. Incorporate Citrus: Next, add the fresh lemon juice and lemon zest. These ingredients not only enhance flavor but also contribute to the pie’s overall texture. Mix on low speed until fully incorporated, ensuring that the mixture is smooth and free of clumps.
Emphasizing Whisking Techniques
For the best results, it’s essential to whisk the filling until it’s light and fluffy. After you combine the condensed milk and lemon juice, switch to a whisk attachment if using a stand mixer, or use a whisk if mixing by hand. Whisk vigorously for about 2-3 minutes. This aeration helps create a lighter filling that will set beautifully in the crust.
Whipping the Cream
The whipped cream is a critical component of this pie, adding a luscious texture that balances the tangy lemon filling.
Achieving Stiff Peaks
1. Start with Cold Equipment: For best results, ensure your mixing bowl and beaters are chilled. This helps the cream whip faster and reach the desired consistency.
2. Mixing Speed and Timing: Pour the heavy cream into your chilled bowl and begin whisking on medium speed. After about 1 minute, increase the speed to high. Watch closely as the cream thickens. After approximately 3-4 minutes, you should begin to see soft peaks form. Continue whisking until stiff peaks develop. This is the point where the cream holds its shape firmly when you lift the whisk.
Importance of Timing
Avoid over-whipping, as this can turn your cream into butter. Stop mixing as soon as you achieve stiff peaks. The whipped cream will add a delightful airy texture to the filling, making each bite of your pie light and refreshing.
Combining the Mixtures
Now it’s time to marry the whipped cream and the lemon filling. This step requires finesse to maintain the airy texture of the whipped cream.
Techniques for Folding
1. Gentle Folding: Start by adding a third of the whipped cream to the lemon filling. Use a spatula to gently fold the cream into the filling using a figure-eight motion. This technique ensures that you don’t deflate the whipped cream, preserving that light texture.
2. Incorporate Gradually: Repeat this process, adding the whipped cream in two more batches. Be gentle and patient; the goal is to keep as much air in the mixture as possible.
Common Mistakes to Avoid
– Overmixing: This can lead to a dense filling that lacks the lightness you desire.
– Not Folding Carefully: If you stir instead of fold, you risk losing the volume of the whipped cream.
Assembling the Pie
With the filling ready, it’s time to assemble your Zesty No-Bake Lemon Dream Pie.
Step-by-Step Guidance
1. Pour the Filling: Carefully pour the lemon filling into your pre-prepared graham cracker crust. Use a spatula to spread it evenly across the crust, ensuring there are no air pockets.
2. Spread with Care: To achieve a smooth top, gently spread the filling to the edges and level it off. A small offset spatula works wonders for this task.
Importance of Chilling Time
Once assembled, cover the pie with plastic wrap and refrigerate for at least 4-6 hours, or ideally overnight. This chilling time allows the filling to set properly, making it easier to slice and serve later.
Serving Suggestions
When it’s time to serve your Zesty No-Bake Lemon Dream Pie, presentation can elevate the experience.
Tips for Attractive Slicing and Presentation
1. Use a Sharp Knife: For clean slices, dip your knife in warm water and wipe it dry before cutting. This technique helps prevent the filling from sticking to the blade.
2. Dusting with Powdered Sugar: A light dusting of powdered sugar on top of the pie before serving adds a lovely visual appeal and a touch of sweetness that complements the zestiness of the lemon.
3. Garnish Options: Consider adding fresh berries or mint leaves for a pop of color. Berries like raspberries or blueberries not only look beautiful but also pair wonderfully with the citrusy flavor.
Nutritional Information
Understanding the nutritional aspects of your Zesty No-Bake Lemon Dream Pie can help you enjoy it mindfully.
Overview of Nutritional Aspects
1. Caloric Content: Each slice of pie (1/8 of the pie) contains approximately 250 calories. This can vary slightly based on the specific ingredients used, particularly the brand of sweetened condensed milk and heavy cream.
2. Key Nutrients: The pie provides a good source of calcium from the cream cheese and heavy cream, and the lemon juice offers a boost of vitamin C.
Portion Sizes and Balanced Diet
Enjoying this pie in moderation is key. It can fit into a balanced diet as an occasional treat. Pair it with a protein-rich side, like Greek yogurt, to balance the sweetness and enhance the nutritional profile of your dessert.
Flavor Variations and Customizations
The Zesty No-Bake Lemon Dream Pie is versatile, allowing for various flavor adaptations to suit different tastes.
Suggestions for Alternative Flavors
1. Berry Infusion: Add fresh blueberries or raspberries into the filling for a fruity twist. You can either mix them in or use them as a topping.
2. Citrus Mix: Experiment with other citrus fruits like lime or orange to create a citrus medley pie. Just substitute the lemon juice and zest accordingly.
Dietary Adaptations
1. Gluten-Free: Use a gluten-free cookie crust made from crushed gluten-free graham crackers or almond flour instead of traditional graham crackers.
2. Dairy-Free Version: Substitute the cream cheese with a dairy-free cream cheese alternative and use coconut cream in place of heavy cream for a delightful dairy-free option.
Conclusion
The Zesty No-Bake Lemon Dream Pie is a refreshing, easy-to-make dessert that bursts with citrus flavor and creamy texture. Its simplicity makes it an ideal choice for gatherings, family dinners, or a delightful treat for yourself.
We encourage you to try this recipe and experience the joy of creating a homemade dessert that’s sure to impress. Whether you stick with the classic lemon flavor or experiment with variations, this pie is a delightful addition to any dessert table. Enjoy the process of baking, and relish the satisfaction of sharing your delicious creation with friends and family. The joy of homemade desserts lies not only in their taste but also in the love and creativity you pour into them.
