Introduction
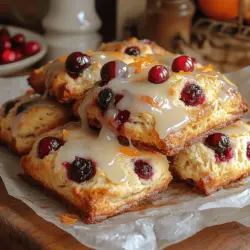
Scones are a quintessential part of many cultures, particularly in the United Kingdom, where they are often enjoyed during afternoon tea. These delightful baked goods have seen a surge in popularity, especially with the addition of vibrant flavors that reflect the changing seasons. Among the various flavors that have captured the hearts of scone enthusiasts, the combination of cranberry and orange stands out. The tartness of cranberries perfectly balances the sweetness and zest of oranges, creating a delightful treat that is as pleasing to the palate as it is to the eyes.
The origins of scones can be traced back to the early 16th century, evolving from a simple bread baked on a griddle to the fluffy, tender pastries we know today. Traditionally served with clotted cream and jam, scones have become a versatile canvas for various flavors and ingredients. The incorporation of fruits, nuts, and spices has transformed the humble scone into an exciting dessert or breakfast option that can be enjoyed any time of day.
Homemade scones hold a special place in many family traditions, often bringing back memories of baking with loved ones in cozy kitchens filled with the fragrant aroma of freshly baked goods. The act of preparing scones can be a bonding experience, whether it’s a quiet Saturday morning or a festive holiday gathering. This recipe for Cranberry Orange Scones not only embraces the spirit of togetherness but also offers a delicious way to celebrate the flavors of winter.
In this article, we will delve into the delightful world of Cranberry Orange Scones. We’ll cover everything from the essential ingredients needed to create these treats, to step-by-step instructions that ensure your scones come out perfectly every time. Along the way, we’ll also explore variations to suit your taste and storage tips to keep your scones fresh.
The Allure of Cranberry Orange Scones
Cranberry Orange Scones are not just a treat; they are an experience. The combination of sweet and tart flavors makes these scones a favorite among many. The bright, citrusy notes of orange zest elevate the entire experience, complementing the chewy, vibrant cranberries that burst with flavor in every bite.
What sets these scones apart is their texture. They strike a perfect balance between being tender and flaky, with a slight crunch on the outside that gives way to a soft, buttery interior. This contrast is what makes scones so appealing, as they can be enjoyed plain or with a dollop of cream or butter. The aroma of freshly baked scones wafting through the kitchen is enough to bring anyone running to the table, eager to enjoy a warm, comforting treat.
Moreover, baking scones is a relatively quick process, making them an ideal choice for breakfast or brunch gatherings. There is something nostalgic about the ritual of baking, whether you’re following a family recipe or trying out something new. The act of mixing, kneading, and shaping the dough brings a sense of satisfaction, and the anticipation of enjoying the end product adds to the joy of the experience.
In this article, we will provide a comprehensive guide to crafting these delightful scones, ensuring that they become a beloved addition to your baking repertoire.
Essential Ingredients for Cranberry Orange Scones
To create the perfect Cranberry Orange Scones, it’s essential to gather the right ingredients. Each component plays a crucial role in achieving the ideal flavor and texture. Here’s a breakdown of the key ingredients you’ll need:
– All-Purpose Flour: The foundation of your scone dough, all-purpose flour provides the necessary structure. It’s important to use the right type of flour to ensure your scones have the perfect texture.
– Granulated Sugar: A touch of sweetness is essential for balancing the tartness of the cranberries. Using granulated sugar helps to create a light and tender crumb.
– Baking Powder: This leavening agent is what gives your scones their lift, making them light and fluffy. Make sure your baking powder is fresh for the best results.
– Salt: A small amount of salt enhances the flavors in your scones, bringing out the sweetness and balancing the tartness of the cranberries.
– Unsalted Butter: The key to achieving a rich, buttery flavor. It’s crucial to use cold butter, as this will lead to a flakier texture when baked. Cut the butter into small cubes before incorporating it into the flour mixture.
– Eggs: Eggs act as a binding agent, providing moisture and richness to the scone dough. They also contribute to the overall structure.
– Heavy Cream: This ingredient adds richness and moisture to the scone dough, creating a tender crumb. The cream also contributes to the scones’ deliciously crisp exterior.
– Cranberries: Dried cranberries are the star of this recipe. Their tartness complements the sweetness of the orange zest perfectly.
– Orange Zest: Freshly grated orange zest adds a vibrant citrus flavor, infusing the scones with a refreshing aroma and taste.
– Optional Glaze: For a finishing touch, you may choose to top your scones with an orange glaze made from powdered sugar and orange juice. This adds an extra layer of sweetness and enhances the scone’s visual appeal.
Now that we’ve covered the essential ingredients, it’s time to move on to the step-by-step instructions for crafting these delightful Cranberry Orange Scones.
Step-by-Step Instructions for Baking Cranberry Orange Scones
Baking scones may seem daunting at first, but with a clear understanding of the process, you’ll be able to create perfect scones every time. Follow these steps for delicious Cranberry Orange Scones:
1. Preparing the Workspace: Tools and Equipment Needed
Before you begin, make sure you have all the necessary tools and equipment on hand. Here’s what you’ll need:
– A large mixing bowl
– A whisk
– A pastry cutter or fork (for cutting in the butter)
– A baking sheet lined with parchment paper
– A rolling pin (optional, if you prefer to roll out the dough)
– A sharp knife or dough cutter for portioning the scones
– Measuring cups and spoons for accuracy
2. Mixing the Dry Ingredients
Start by preheating your oven to 400°F (200°C). In a large mixing bowl, combine the all-purpose flour, granulated sugar, baking powder, and salt. Whisk these dry ingredients together until they are evenly combined. This step is essential for ensuring that the baking powder is distributed evenly throughout the flour.
3. Cutting in the Butter
Next, add the cold, cubed unsalted butter to the flour mixture. Using a pastry cutter or fork, cut the butter into the flour until the mixture resembles coarse crumbs. This process is crucial for creating the flaky texture that is characteristic of scones. Take care not to overwork the mixture; you want to see small bits of butter still visible.
4. Adding the Wet Ingredients
In a separate bowl, whisk together the eggs and heavy cream. Then, add the freshly grated orange zest and the dried cranberries to the wet mixture. Stir until everything is combined. This step ensures that the cranberries are evenly distributed throughout the dough.
5. Combining Dry and Wet Mixtures
Pour the wet mixture into the dry ingredients. Using a spatula or wooden spoon, gently stir until the dough just comes together. Be cautious not to overmix; it’s okay if the dough is slightly crumbly. If the dough seems too dry, you can add a tablespoon of cream to help it bind together.
6. Shaping the Dough
Turn the dough out onto a lightly floured surface. Gently knead the dough a few times until it holds together. Pat the dough into a thick disc, about 1 inch in height. Using a sharp knife or dough cutter, cut the disc into wedges or use a biscuit cutter to create round scones. Place the scones on the prepared baking sheet, leaving space between each one.
7. Baking the Scones
Bake the scones in the preheated oven for 15-20 minutes, or until they are golden brown on top and a toothpick inserted into the center comes out clean. Keep an eye on them towards the end of the baking time to prevent over-baking.
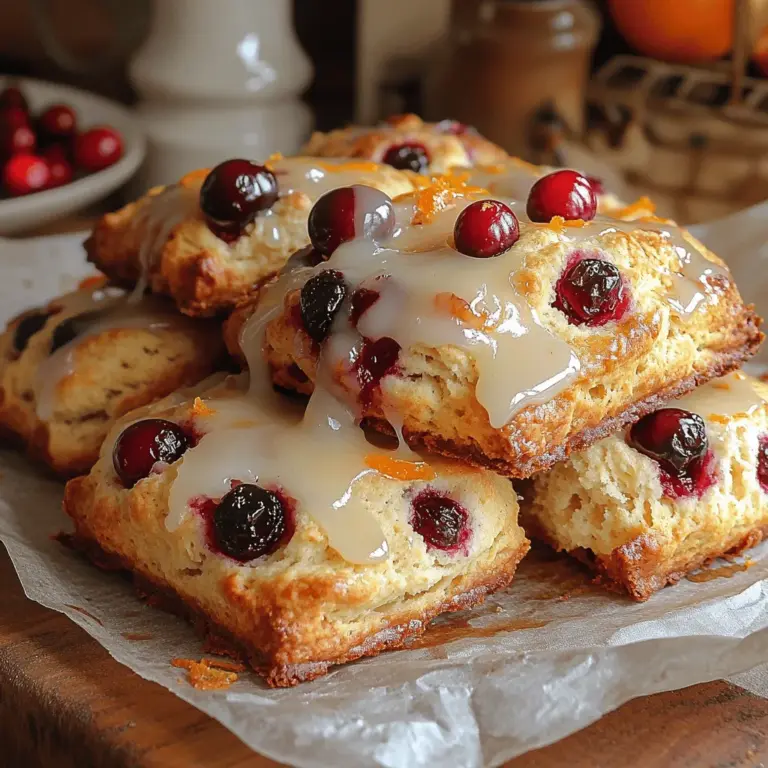
By following these steps, you will be well on your way to creating a batch of delightful Cranberry Orange Scones that are sure to impress. Stay tuned for more detailed tips, variations, and storage advice in the continuation of this article.
{{image_2}}
Shaping the Cookies: Techniques for Uniformity
Shaping your scones correctly is crucial for achieving that perfect, uniform look and texture. For the best results, use a light touch when handling the dough to maintain the airiness that contributes to their fluffy texture. After mixing your dough, turn it out onto a floured surface. Gently pat it into a disc about 1 inch thick. Use a sharp knife or a pastry cutter to divide the disc into equal wedges, or use a round cookie cutter for circular scones. Ensure you don’t twist the cutter as you press down, which could hinder the scones from rising properly.
For added uniformity, consider using a kitchen scale to weigh each portion of dough. This technique helps ensure that all scones bake evenly, resulting in a consistent texture and taste. Also, remember to brush the tops with a little milk or cream before baking. This will help achieve a beautiful golden-brown crust and an appealing shine.
Baking the Cookies: Oven Temperature and Timing for the Best Results
The baking temperature and timing are critical components in creating delicious scones. Preheat your oven to 425°F (220°C). A hot oven is essential for getting the scones to rise quickly, which creates a light and fluffy texture. When placing the scones in the oven, leave enough space between them to allow for expansion during baking.
Bake your scones for about 15-20 minutes, or until they’re lightly golden on top and a toothpick inserted into the center comes out clean. Keep a close eye on them during the last few minutes of baking to avoid over-browning. Each oven can vary slightly in temperature, so it’s beneficial to learn how your oven behaves.
Cooling the Cookies: Importance of Letting Them Rest
Once your scones have reached that perfect golden hue, it’s tempting to dig in right away. However, allowing them to cool for a few minutes on a wire rack is essential. This cooling period helps set their structure, making them easier to handle and enhancing their flavor. If you skip this step, the scones may crumble when you cut into them, losing that lovely flaky texture.
Let your scones cool for about 10 minutes before serving. If you’re feeling indulgent, drizzle some icing made from powdered sugar and orange juice over the top for an extra touch of sweetness.
Variations to the Classic Recipe
One of the joys of baking scones is the ability to customize them to suit your taste. Here are some delightful variations that you can try:
Gluten-Free Cranberry Orange Scones: Substituting Flours
For those who are gluten-sensitive, you can easily adapt this recipe by using a gluten-free flour blend. Look for blends that include xanthan gum, which helps in mimicking the elasticity of gluten. A combination of almond flour and coconut flour can also provide a unique flavor and texture. Be cautious with the liquid content, as gluten-free flours may absorb moisture differently.
Vegan Cranberry Orange Scones: Replacing Eggs and Butter
To make these scones vegan, substitute the butter with a plant-based alternative, such as coconut oil or vegan butter. You can replace the egg by using a flaxseed meal or chia seed mixture (1 tablespoon of flaxseed meal or chia seeds mixed with 2.5 tablespoons of water equals one egg). This substitution not only makes the scones vegan but also adds a slight nutty flavor.
Adding Nuts or Other Mix-Ins: Pecans, Walnuts, or Dried Fruits
Enhance your scones by adding mix-ins like chopped pecans or walnuts for a crunchy texture. You can also incorporate dried fruits like apricots or raisins, which pair beautifully with the cranberry and orange flavors. Just make sure to adjust the sugar slightly to accommodate the sweetness of your mix-ins.
Experimenting with Spices: Cinnamon, Sea Salt, or Espresso Powder
Don’t hesitate to experiment with spices to elevate the flavor profile of your scones. A pinch of cinnamon can add warmth, while a sprinkle of sea salt can enhance the sweetness. For coffee lovers, adding a touch of espresso powder can create a delightful contrast to the citrus notes.
Unique Chocolate Combinations: White Chocolate, Butterscotch, or Peanut Butter Chips
If you’re a fan of chocolate, consider adding white chocolate chips or butterscotch chips for a decadent twist. These sweet additions complement the tartness of cranberries beautifully. Alternatively, try including peanut butter chips for a unique flavor combination that will surely impress.
Common Mistakes to Avoid When Baking Scones
Baking scones can sometimes be tricky, and there are several common pitfalls to watch out for:
Overmixing the Dough: Consequences for Texture
One of the most significant mistakes is overmixing the dough. This can lead to tough, dense scones instead of the light and flaky texture you desire. Mix just until the ingredients are combined, and you see no streaks of flour.
Not Measuring Ingredients Accurately: Importance of Precision
Baking is a science, and accurate measurements are essential. Use a kitchen scale for the best results, especially when it comes to flour. Too much flour can result in dry scones, while too little can lead to a flat outcome.
Baking at the Wrong Temperature: Effects on Scone Quality
As mentioned earlier, baking at the right temperature is crucial. An oven that is too cool will result in flat scones, while an oven that is too hot can burn the edges before the center is cooked.
Skipping the Chilling Stage: Why It Matters for the Dough
Chilling the dough before baking helps firm up the fat, which in turn contributes to a better rise and texture. If you skip this step, your scones may spread too much during baking, resulting in a less desirable shape.
Not Allowing Scones to Cool Properly: Impact on Texture and Flavor
Finally, allow your scones to cool before serving. This brief resting period enhances flavor and texture, making for a more enjoyable experience.
Storage Tips for Homemade Scones
To keep your scones fresh and delicious, follow these storage tips:
Best Practices for Storing Scones: Airtight Containers vs. Jars
Store your cooled scones in an airtight container at room temperature. This will help retain their moisture and prevent them from going stale. Avoid glass jars, as they may not provide an adequate seal.
Freezing Scones: How to Do It Properly for Long-Term Storage
For longer storage, you can freeze your scones. Place them in a single layer on a baking sheet to freeze for about an hour before transferring them to a freezer-safe bag. This prevents them from sticking together. When you’re ready to enjoy them, simply bake them straight from the freezer, adding a few extra minutes to the baking time.
Reheating Scones for the Best Taste: Methods to Restore Freshness
To reheat scones, preheat your oven to 350°F (175°C) and warm them for about 10 minutes. This method helps restore their original texture, making them taste freshly baked.
The Joy of Sharing Scones
Baking scones is not just about the final product; it’s about creating memories. Scones are perfect for gatherings, tea parties, or a cozy brunch with family. They’re easy to share and can bring people together over a warm cup of tea or coffee.
Reflect on your experiences of sharing baked goods with loved ones. Whether it’s a friend’s birthday celebration or a quiet afternoon with family, scones can make any occasion feel special. Encourage readers to take the time to bake and share these delightful treats, creating joyful memories in the process.
Conclusion
The timeless appeal of cranberry orange scones lies in their perfect blend of sweet and tart flavors, paired with the crumbly, tender texture that makes them irresistible. Baking from scratch not only provides a sense of accomplishment but also fills your home with delightful aromas and warmth.
We encourage you to try this recipe and make it your own by exploring the various variations and tips mentioned. Whether you stick to the classic version or experiment with new flavors, these scones are sure to bring joy and satisfaction to your baking adventures. Embrace the process, share your creations, and enjoy every bite of your homemade treats!