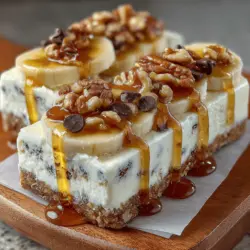
Chilly Delight: Frozen Yogurt Banana Walnut Bars
Introduction
As the conversation around health and wellness continues to evolve, the demand for healthy desserts is on the rise. People are increasingly seeking alternatives that satisfy their sweet tooth without compromising their nutritional goals. Enter the Frozen Yogurt Banana Walnut Bars—a delectable and nutritious treat that not only tantalizes the taste buds but also aligns perfectly with a health-conscious lifestyle.
These bars are a wonderful fusion of flavors and textures, combining the natural sweetness of ripe bananas, the creaminess of Greek yogurt, and the delightful crunch of walnuts. Not only do they provide a refreshing option for warm days, but they also deliver a wealth of nutritional benefits, making them a smart choice for anyone looking to indulge without guilt.
The key ingredients in this recipe—bananas, Greek yogurt, and walnuts—each bring their own unique health benefits to the table. Bananas are a powerhouse of vitamins and minerals, Greek yogurt offers a rich source of protein and probiotics, and walnuts are packed with healthy fats and antioxidants. Together, these ingredients create a wholesome dessert that can be enjoyed at any time of day.
Understanding the Ingredients
Nutritional Benefits of Bananas
Bananas are not just a convenient snack; they are also a nutritional powerhouse. Rich in potassium, bananas help support heart health and maintain healthy blood pressure levels. They are also an excellent source of vitamins such as vitamin C and vitamin B6, which play vital roles in metabolic processes and immune function. One of the standout features of bananas is their natural sweetness, which makes them a fantastic base for desserts without the need for excessive added sugars. Their creamy texture when mashed provides a smooth consistency that enhances the overall mouthfeel of the Frozen Yogurt Banana Walnut Bars.
The Power of Greek Yogurt
Greek yogurt is a staple in many health-conscious diets, and for good reason. It is significantly higher in protein compared to regular yogurt, making it an excellent choice for those looking to increase their protein intake. The probiotics naturally present in Greek yogurt contribute to gut health, aiding digestion and promoting a balanced microbiome. Moreover, Greek yogurt’s tangy flavor beautifully complements the sweetness of bananas, creating a harmonious balance in the bars. Its creamy consistency also helps bind the ingredients together, ensuring a delightful texture that holds up well when frozen.
Why Walnuts?
Walnuts are often referred to as a superfood for their impressive nutritional profile. They are a rich source of healthy fats, particularly omega-3 fatty acids, which are known for their anti-inflammatory properties and benefits for heart health. Including walnuts in the Frozen Yogurt Banana Walnut Bars not only adds a delightful crunch but also enhances the nutritional value of the dessert. Their slightly bitter flavor contrasts with the sweetness of bananas, creating a complex and satisfying taste experience. Additionally, walnuts are packed with antioxidants, further boosting the health benefits of this dessert.
Sweeteners: Honey vs. Maple Syrup
When it comes to sweetening these bars, you have a choice between honey and maple syrup—both of which offer unique flavors and health benefits. Honey is known for its natural antibacterial properties and is an excellent source of antioxidants. It provides a rich, floral sweetness that pairs beautifully with the other ingredients. On the other hand, maple syrup brings a distinct, earthy flavor that can add depth to the bars. It is also a source of essential minerals like manganese and zinc. Both sweeteners can enhance the overall flavor profile of the Frozen Yogurt Banana Walnut Bars, so the choice ultimately comes down to personal preference.
Step-by-Step Guide to Making Frozen Yogurt Banana Walnut Bars
Preparation of Bananas
The first step in creating these delightful bars is selecting the perfect bananas. Ripe bananas are essential, as they offer the best flavor and natural sweetness. Look for bananas that are speckled with brown spots; this indicates that they are at their peak sweetness. Once you have your ripe bananas, it’s time to mash them. A fork works well for this purpose, but for a smoother consistency, you can also use a potato masher or even a blender. Aim for a smooth puree with minimal lumps, as this will contribute to the creamy texture of the bars.
Mixing the Base
With your bananas prepared, it’s time to combine the main ingredients. In a mixing bowl, combine the mashed bananas with Greek yogurt. Make sure to mix thoroughly, as this step is crucial for achieving a uniform texture. The goal is to create a smooth, creamy base where the flavors meld together seamlessly. You can use a whisk or an electric mixer to ensure that all ingredients are well incorporated. Once the banana and yogurt are combined, add your choice of sweetener—honey or maple syrup—along with any optional flavorings like vanilla extract or a pinch of cinnamon. Mixing these ingredients together will enhance the overall flavor profile of your bars.
Incorporating Walnuts and Optional Chocolate Chips
After the base is well-mixed, it’s time to add the walnuts. Chop the walnuts into smaller pieces to ensure they are evenly distributed throughout the mixture. This not only adds texture but also makes each bite delightful. If you want to elevate the flavor further, consider adding mini chocolate chips. The rich, melty chocolate pairs wonderfully with the sweetness of the bananas and the crunch of the walnuts, creating a decadent yet healthy treat. Stir the walnuts (and chocolate chips, if using) into the mixture until they are well incorporated, ensuring that each bar will have a balance of flavors and textures.
Stay tuned for the next part, where we will explore the process of setting the bars, freezing them to perfection, and serving suggestions to make this treat even more enjoyable!
{{image_2}}
Techniques for Folding in Ingredients Without Over-Mixing
When it comes to making Frozen Yogurt Banana Walnut Bars, the technique of folding in ingredients is essential for achieving a creamy texture without losing airiness. To fold ingredients properly, start by using a rubber spatula to gently scoop under the mixture and lift it over the top. Rotate the bowl as you go to ensure that the entire mixture is combined without creating a homogenous batter. This technique minimizes gluten development, which can lead to a denser texture. Keep your movements gentle and controlled, especially when incorporating delicate ingredients like chopped walnuts or chocolate chips.
Discussing Flavor Balance with the Addition of Chocolate Chips
Adding chocolate chips to your Frozen Yogurt Banana Walnut Bars introduces a delightful contrast to the natural sweetness of bananas and the nuttiness of walnuts. It’s important to choose the right type of chocolate for balance; semi-sweet or dark chocolate chips work well to provide a slight bitterness that complements the sweetness of the yogurt and fruit. Aim for about 1/2 cup of chocolate chips for a balanced flavor profile. For a more gourmet touch, consider using chopped dark chocolate or even flavored chips like white chocolate or mint chocolate to enhance the overall taste experience.
Choosing the Right Baking Dish
Recommendations for Dish Sizes and Types
Selecting the appropriate baking dish is crucial for ensuring even freezing and easy cutting of your Frozen Yogurt Banana Walnut Bars. A standard 9×9-inch square baking dish is ideal for this recipe, providing the perfect thickness for bars that are not too thick or too thin. Alternatively, you can use an 8×8-inch dish for thicker bars or a 9×13-inch dish for thinner ones. Glass or metal dishes both work well, but metal tends to freeze the mixture more evenly due to better heat conduction.
The Role of Parchment Paper in Easy Removal
Using parchment paper is a game-changer when it comes to removing your frozen yogurt bars from the dish. Line the bottom and sides of your chosen baking dish with parchment paper, leaving some overhang on the edges. This will allow for easy lifting of the frozen bars once they have set. It also helps to prevent sticking, ensuring that your bars maintain their shape and presentation. For added security, lightly grease the parchment paper with a non-stick spray.
Freezing Process
Importance of Proper Covering and Freezing Time
Once your mixture is poured into the prepared baking dish, it’s crucial to cover it properly to prevent ice crystals from forming. Use a layer of plastic wrap directly on the surface of the mixture, then cover the entire dish with aluminum foil. This double-layer method helps keep the mixture airtight and ensures a creamy texture post-freezing. Aim to freeze your bars for at least 4-6 hours, or until they are firm to the touch.
Tips on Ensuring Even Freezing for Optimal Texture
To achieve an optimal texture in your Frozen Yogurt Banana Walnut Bars, ensure that the mixture is spread evenly in the baking dish before freezing. Additionally, place the dish in the coldest part of your freezer to encourage faster and more even freezing. If your freezer has multiple shelves, avoid stacking other items on top of the dish, as this can create uneven temperatures that affect the freezing process.
Cutting and Serving Suggestions
Techniques for Slicing the Bars Cleanly
Once your frozen yogurt bars are fully set, it’s time to cut and serve. To slice the bars cleanly, remove them from the baking dish using the parchment overhang. Place the block on a cutting board and use a sharp knife that has been warmed under hot water for clean cuts. Wipe the knife with a paper towel between cuts to maintain neat edges. For best results, aim for squares or rectangles that are about 2 inches in size, perfect for individual servings.
Presentation Ideas to Enhance Visual Appeal
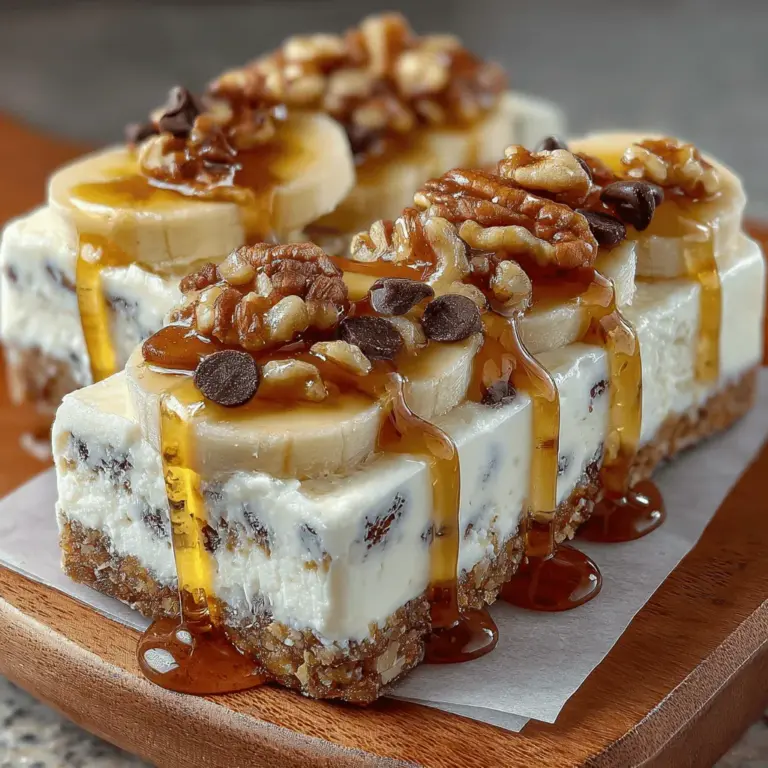
Presentation can elevate the enjoyment of your Frozen Yogurt Banana Walnut Bars. Consider serving them on a chilled plate or arranging them on a platter garnished with fresh banana slices or a sprinkle of chopped walnuts. A drizzle of melted chocolate on top or a dusting of cocoa powder can also enhance visual appeal. For an added touch, serve with a side of yogurt or fresh fruit for a colorful, inviting dessert.
Health and Dietary Considerations
Gluten-Free and Dairy Options
For those with gluten sensitivities, making your Frozen Yogurt Banana Walnut Bars gluten-free is easy. Simply ensure that all ingredients, including any granola or mix-ins, are certified gluten-free. Additionally, you can opt for gluten-free oats if you choose to add them for texture.
If you are looking for dairy-free options, there are plenty of yogurt alternatives available on the market. Coconut yogurt, almond milk yogurt, or soy yogurt can be used as substitutes for traditional yogurt, maintaining the creamy texture and flavor profile of the bars while accommodating dietary restrictions.
Customizing Your Bars
One of the joys of making Frozen Yogurt Banana Walnut Bars is the ability to customize them to your taste preferences. Consider adding other mix-ins like dried fruits, chia seeds, or different nut varieties for an additional texture and flavor boost. You can also experiment with various flavorings; a dash of cinnamon or a splash of vanilla extract can add warmth, while a hint of nutmeg can introduce an aromatic twist.
Storage and Shelf Life
Best Practices for Storing Frozen Bars
To keep your Frozen Yogurt Banana Walnut Bars fresh and delicious, store them in an airtight container. You can also wrap individual bars in plastic wrap before placing them in the container to minimize exposure to air. This method helps to prevent freezer burn and maintains the bars’ creamy texture.
How Long the Bars Can Be Stored Without Losing Quality
When stored properly, your bars can last in the freezer for up to 3 months without losing quality. After this time, while they may still be safe to eat, you may notice a decline in flavor and texture. Label your storage container with the date to keep track of freshness, ensuring you enjoy your homemade treat at its best.
Conclusion
Making Frozen Yogurt Banana Walnut Bars is not only an easy and fun process but also a rewarding one that combines nutrition with taste. With the right techniques for mixing and freezing, you can create a delightful treat that pleases everyone in the family. These bars are perfect for a snack, dessert, or even a healthy breakfast option on-the-go.
Encouraging yourself and others to try this recipe can lead to a satisfying experience that promotes healthier eating habits without sacrificing flavor. Homemade desserts like these Frozen Yogurt Banana Walnut Bars provide an opportunity to indulge while still being mindful of nutrition. Enjoy the process of making these bars and the joy of sharing them with friends and family!