
Frozen Yogurt Mocha Cookie Cups Recipe
When it comes to indulging in delicious desserts, the Frozen Yogurt Mocha Cookie Cups stand out as a delightful treat that perfectly marries rich chocolate flavors with refreshing coffee-infused yogurt. This unique dessert not only satisfies your sweet tooth but also offers a whimsical twist on traditional cookie cups, making it an ideal choice for various occasions—from lively parties and family gatherings to a cozy night in.
What makes these cookie cups particularly appealing is their delightful fusion of flavors. The combination of rich cocoa and the creamy texture of frozen yogurt creates a balance that’s both satisfying and refreshing. This recipe showcases the versatility of frozen yogurt, elevating it from a simple snack to an impressive dessert that will surely impress your guests. Plus, the simplicity of the recipe means that even novice bakers can whip up a batch with ease, making these cookie cups an accessible option for anyone looking to add a touch of sweetness to their day.
Understanding the Ingredients
To create the perfect Frozen Yogurt Mocha Cookie Cups, it’s essential to understand the key ingredients that contribute to the overall flavor and texture of this dessert. Each component plays a vital role in achieving the right balance of taste and consistency.
All-Purpose Flour
All-purpose flour serves as the foundation for the cookie cups, providing the necessary structure and texture. When flour is combined with other ingredients, it forms gluten, which gives the cookies their chewy consistency. The right amount of flour is crucial; too little can lead to fragile cups, while too much can result in a dense texture. Measuring accurately is the first step towards cookie perfection.
Cocoa Powder
Cocoa powder is the star ingredient that adds a deep, rich chocolate flavor to the cookie cups. It not only enhances the taste but also contributes to the beautiful dark color of the cookies. When selecting cocoa powder, consider using unsweetened varieties for a more balanced flavor profile that complements the sweetness of the yogurt.
Unsalted Butter
The type and temperature of butter used in baking can significantly impact the final product. Unsalted butter is preferred in this recipe, as it allows for better control over the overall saltiness of the dish. Additionally, using butter at room temperature helps achieve that desired light and fluffy texture when creamed with sugars, setting the stage for a delicious cookie base.
Sugars (Brown and Granulated)
A combination of brown and granulated sugars is used in this recipe to achieve a perfect balance of sweetness and texture. Granulated sugar contributes to the structure of the cookie, while brown sugar adds moisture and a subtle caramel flavor due to its molasses content. This duo not only sweetens the cookie cups but also enhances their chewiness.
Frozen Yogurt
The star of the show in this dessert is, of course, the frozen yogurt. You can choose from various flavors, but a coffee-flavored yogurt is recommended to enhance the mocha experience. The creamy, cool nature of frozen yogurt contrasts beautifully with the warm, rich cookie base, creating a delightful sensory experience. Whether you prefer a classic coffee flavor or something more adventurous, the choice is yours!
Optional Garnishes
To elevate the presentation and flavor of your Frozen Yogurt Mocha Cookie Cups, consider adding optional garnishes such as whipped cream, a dusting of cocoa powder, or even chocolate shavings. These additions not only enhance the visual appeal of the dessert but also provide an extra layer of flavor that can take your cookie cups to the next level.
Preparation Steps for Success
Creating delicious Frozen Yogurt Mocha Cookie Cups requires some basic preparation. Here’s a step-by-step guide to ensure your baking process goes smoothly.
Prepping the Oven and Muffin Tin
Before diving into mixing the ingredients, preheat your oven to the recommended temperature. Preheating is essential for even baking, ensuring that your cookie cups rise properly and develop a delightful texture. Additionally, prepare your muffin tin by greasing it lightly or using muffin liners. This step will help prevent the cookie cups from sticking and make for easier removal once they’re baked.
Mixing the Dry Ingredients
Start by sifting together your dry ingredients: all-purpose flour, cocoa powder, baking soda, and salt. Sifting helps to aerate the flour and ensures an even distribution of the baking soda and salt throughout the mixture. This step is crucial, as it prevents clumps and guarantees that your cookie cups will rise evenly in the oven.
Creaming Butter and Sugars
In a mixing bowl, cream the unsalted butter along with the granulated and brown sugars. Using an electric mixer on medium speed, beat the butter and sugars together until the mixture becomes light and fluffy. This process incorporates air into the butter, which is essential for creating a light texture in your cookie cups. Aim for a creamy consistency that is pale in color, which indicates that you’ve successfully incorporated enough air.
Incorporating Wet Ingredients
Once your butter and sugars are perfectly creamed, it’s time to add the wet ingredients. Begin by adding eggs and vanilla extract to the mixture. Mix on low speed until just combined to avoid overmixing. Incorporating these ingredients seamlessly will ensure that your batter remains light and airy, which is key to achieving the perfect cookie cup texture.
The Art of Combining Ingredients
The final step in preparing your batter involves carefully combining the dry and wet ingredients. This process requires a gentle hand; overmixing can lead to tough cookie cups due to the overdevelopment of gluten. Gradually add the dry mixture into the wet ingredients, folding it in until just combined. The goal is to achieve a uniform batter without overworking it, which will result in tender, melt-in-your-mouth cookie cups.
By understanding the ingredients and following these initial preparation steps, you set the stage for creating unforgettable Frozen Yogurt Mocha Cookie Cups. The next part of this article will detail the baking process and how to assemble these delightful treats, ensuring that every bite is a perfect blend of flavors and textures. Stay tuned!
{{image_2}}
Importance of Not Overmixing for Optimal Cookie Texture
When preparing the cookie dough for your Frozen Yogurt Mocha Cookie Cups, one critical aspect to keep in mind is the importance of not overmixing. Overmixing can lead to tough cookies, as it develops the gluten in the flour more than desired. Instead, mix until the ingredients are just combined. You want to see a few flour streaks remaining, as they will incorporate fully during the folding process. This technique ensures that your cookie cups will be soft and chewy, creating the perfect vessel for the creamy frozen yogurt filling.
Techniques for Folding in Chocolate Chips Effectively
Once your dough is ready, it’s time to incorporate the chocolate chips. To do this effectively, use a spatula or wooden spoon to gently fold in the chips. Start by placing your chocolate chips in the center of the dough and then scoop from the bottom of the bowl, lifting the dough over the chocolate chips. Repeat this motion gently until the chocolate chips are evenly distributed. This method minimizes the risk of breaking the chips while ensuring that every cookie cup is packed with delicious chocolatey goodness.
Baking the Cookie Cups
Ideal Baking Time and Visual Cues for Doneness
Next, it’s time to bake! Preheat your oven to 350°F (175°C) and prepare your muffin tin with cooking spray or paper liners. Scoop the dough into the muffin cups, filling them about three-quarters full. Bake for 10-12 minutes, or until the edges are golden brown and the centers appear set but slightly soft. The cookie cups will continue to firm up as they cool, so avoid the temptation to bake them until completely firm, as this will result in overbaking.
Cooling Process: Importance of Allowing the Cookie Cups to Cool Before Creating Wells
Once baked, allow the cookie cups to cool in the muffin tin for about 5 minutes before transferring them to a wire rack. This step is crucial as it makes the cookie cups easier to handle, preventing breakage. After they have cooled slightly, use the back of a teaspoon or a small measuring spoon to gently press into the center of each cookie cup to create a well for the frozen yogurt. Be careful not to press too hard, as you want to maintain the integrity of the cookie structure.
Creating the Perfect Frozen Yogurt Filling
Techniques for Creating Wells in the Cookie Cups
Creating wells in your cookie cups is a simple yet important step. After allowing the cookie cups to cool, gently push down in the center with your spoon, making sure to create a deep enough well to hold a generous amount of frozen yogurt. The cavity should be wide enough to accommodate your filling but not so deep that it pierces through the bottom of the cup. This step is essential for ensuring that each cookie cup holds its delicious filling without leaking.
Suggestions for Filling the Wells with Frozen Yogurt, Emphasizing Presentation
Now that you have your wells ready, it’s time to fill them with frozen yogurt. For a visually appealing presentation, use a piping bag fitted with a large round tip to fill each well. This method creates a beautiful swirl effect that enhances the aesthetic appeal of your dessert. Choose your favorite flavors of frozen yogurt, such as chocolate or coffee, to complement the mocha flavor of your cookie cups. Top each filled cup with a dollop of whipped cream for added creaminess and a delightful look.
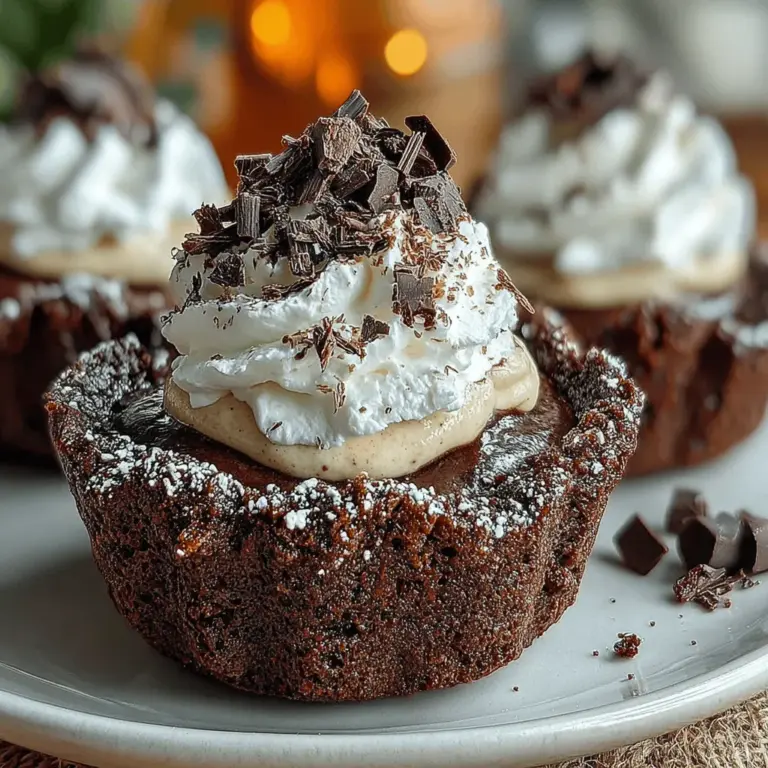
Garnishing for Visual Appeal
Creative Ideas for Garnishing with Whipped Cream and Cocoa or Chocolate Shavings
To elevate the presentation of your Frozen Yogurt Mocha Cookie Cups, consider garnishing them creatively. After piping the whipped cream, sprinkle a light dusting of cocoa powder or finely grated chocolate shavings on top. This not only adds a beautiful contrast against the white of the whipped cream but also enhances the chocolate flavor of the dessert. For a touch of elegance, you could even add a few chocolate curls or a drizzle of chocolate sauce over the top.
The Balance of Aesthetics and Flavor Enhancement Through Garnishes
While the garnishes are primarily for visual appeal, they also serve to enhance the flavor profile of the cookie cups. The bitterness of cocoa powder or the richness of chocolate shavings complements the sweetness of the frozen yogurt and the cookie base. Striking the right balance between aesthetics and flavor will make your dessert not only a treat for the taste buds but also a feast for the eyes.
Freezing for the Ideal Texture
Importance of Freezing the Cookie Cups for the Right Firmness and Eating Experience
To achieve the perfect texture for your Frozen Yogurt Mocha Cookie Cups, you’ll need to freeze them for a certain period. Once filled and garnished, place the cookie cups in the freezer for at least 2-3 hours to allow the frozen yogurt to firm up. This step is crucial, as it ensures that each bite is a delightful combination of crunchy cookie and creamy yogurt, rather than a soggy mess.
Tips for Timing and Serving for the Best Texture
When it’s time to serve your cookie cups, remove them from the freezer and let them sit at room temperature for about 5-10 minutes. This brief rest will soften the frozen yogurt slightly, making it easier to eat without compromising the overall texture. If you’re serving these at a gathering, consider preparing them beforehand and storing them in the freezer until just before serving to maintain their freshness.
Serving Suggestions
Discussion on How to Serve the Frozen Yogurt Mocha Cookie Cups
Your Frozen Yogurt Mocha Cookie Cups are now ready to serve! Present them on a decorative platter or individual dessert plates for an elegant touch. You can also accompany them with a small scoop of extra frozen yogurt or a side of chocolate sauce for dipping. This adds an interactive element to your dessert, allowing guests to customize their experience.
Ideas for Pairing with Drinks or Other Desserts
Consider pairing your cookie cups with a rich espresso or a creamy latte to complement the mocha flavors. Alternatively, a glass of cold milk or a refreshing iced coffee would also pair beautifully. If you’re feeling adventurous, serve these cookie cups alongside an assortment of other desserts, like brownies or fruit tarts, for a delightful dessert spread that will impress your guests.
Nutritional Information
Breakdown of Calories and Nutritional Content Per Serving
For those who are mindful of their dietary intake, here’s a breakdown of the nutritional content per serving of the Frozen Yogurt Mocha Cookie Cups. Each cookie cup contains approximately 150 calories, with 6 grams of fat, 22 grams of carbohydrates, and 3 grams of protein. The exact nutritional values may vary based on the specific ingredients used, such as the type of yogurt or chocolate chips.
Considerations for Dietary Preferences or Restrictions
These cookie cups can be easily adapted to meet various dietary preferences. For a gluten-free version, substitute regular flour with a gluten-free blend, and ensure that the chocolate chips are also gluten-free. You can also use dairy-free yogurt and chocolate for a vegan option. This versatility makes the Frozen Yogurt Mocha Cookie Cups a delightful treat for everyone to enjoy!
Conclusion
In summary, the Frozen Yogurt Mocha Cookie Cups are a delicious and visually stunning dessert that combines the rich flavors of mocha with the creaminess of frozen yogurt. With their soft cookie base and delightful presentation, these treats are perfect for gatherings, celebrations, or simply as a sweet indulgence after a long day. We encourage you to try this recipe and experience the joy of creating and sharing these delightful cookie cups with your loved ones. Baking is not just about creating delicious treats; it’s also about the joy of bringing people together over sweet moments. Enjoy your baking adventure!
