Introduction
There’s something undeniably comforting about chocolate chip cookie bars. The smell of freshly baked cookies wafting through the kitchen can evoke a sense of nostalgia, reminding many of their childhood baking experiences. These chewy chocolate chip cookie bars combine the classic flavors of traditional chocolate chip cookies with the convenience of a bar format, making them an appealing treat for any occasion. Whether you’re hosting a gathering, craving a sweet snack, or looking for a simple dessert to satisfy your sweet tooth, these cookie bars are sure to impress.
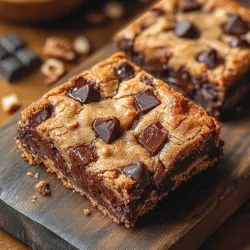
What truly sets these cookie bars apart is their delightful chewy texture. A good cookie bar should be soft and moist with a satisfying bite, making it perfect for those who prefer their treats to have a little more substance. The chewy consistency is achieved through the careful balance of ingredients and baking techniques, ensuring that each bite is both delicious and fulfilling.
Versatile and easy to make, chewy chocolate chip cookie bars can be customized to suit individual tastes. Whether you prefer classic semi-sweet chocolate chips or want to experiment with nuts, white chocolate, or even a sprinkle of sea salt on top, the possibilities are endless. These cookie bars are not only a great addition to any dessert table but also make for a delightful snack on the go.
Understanding the Ingredients
To create the perfect chewy chocolate chip cookie bars, it’s essential to understand the role of each ingredient in the recipe. Each component contributes to the overall flavor, texture, and structure, resulting in a delicious treat that everyone will love.
Flour: The Foundation for Structure
Flour serves as the backbone of any baked good, providing the necessary structure to hold the cookie bars together. In this recipe, all-purpose flour is the best choice as it offers a balance of strength and tenderness. The protein content in all-purpose flour allows for the formation of gluten, which helps create that chewy texture we’re aiming for. If you want to experiment, you can also consider using a blend of all-purpose and whole wheat flour for a nuttier flavor and increased fiber content.
Baking Soda and Salt: Importance in Balancing Flavors and Aiding in Rise
Baking soda is a leavening agent that helps the cookie bars rise while baking, contributing to their light and airy texture. When combined with an acid (such as brown sugar), baking soda releases carbon dioxide, which creates tiny air pockets in the dough, giving the bars a delightful lift. Salt, on the other hand, enhances the overall flavor of the cookie bars. It acts as a flavor enhancer, bringing out the sweetness of the sugars and helping to balance the flavors.
Butter: Effects of Using Unsalted vs. Salted
Butter is a key ingredient that adds richness and moisture to the cookie bars. When it comes to baking, unsalted butter is generally preferred because it allows for better control over the salt content in the recipe. Using unsalted butter also gives bakers the flexibility to adjust the flavor to their liking. The temperature of the butter is also crucial; soft, room-temperature butter is ideal for creaming with the sugars, as it incorporates air into the mixture, leading to a lighter texture.
Sugars: The Role of Granulated and Brown Sugar in Texture and Flavor
A combination of granulated sugar and brown sugar is used in this recipe to create a balance of sweetness and moisture. Granulated sugar contributes to the spread of the cookie bars, while brown sugar, which contains molasses, adds moisture and a deeper flavor profile. This combination is key to achieving the chewy texture we desire, as the brown sugar helps retain moisture, resulting in soft and chewy cookie bars.
Eggs: Binding Agents that Contribute to Chewiness
Eggs play a vital role in baking, acting as binding agents that help hold the ingredients together. In addition to providing structure, eggs also contribute to the chewiness of the cookie bars. The proteins in the eggs coagulate during baking, creating a firm yet tender texture. For this recipe, using large eggs is standard, but you can also experiment with egg substitutes if you have dietary restrictions.
Chocolate Chips: Choosing the Right Type for Taste and Melting Properties
No chocolate chip cookie bar would be complete without the chocolate chips! The choice of chocolate can greatly influence the overall flavor of the bars. Semi-sweet chocolate chips are the classic choice, offering a perfect balance of sweetness and richness. However, feel free to mix in milk chocolate, dark chocolate, or even white chocolate chips for a unique twist. The key is to choose high-quality chocolate that will melt beautifully and enhance the flavors of the cookie bars.
Nuts: Optional but Beneficial for Added Crunch
While nuts are entirely optional, they can add a delightful crunch and additional flavor to your chewy chocolate chip cookie bars. Chopped walnuts or pecans are popular choices that complement the sweetness of the chocolate. If you decide to include nuts, be sure to toast them lightly before mixing them into the batter. This step enhances their flavor and adds an extra layer of richness to the bars.
Preparation Steps in Detail
Now that we’ve covered the essential ingredients, it’s time to delve into the preparation steps. Following these instructions meticulously will ensure that your chewy chocolate chip cookie bars turn out perfect every time.
Preheating the Oven and Preparing the Pan
Before you start mixing the ingredients, preheat your oven to 350°F (175°C). Preheating is a crucial step in baking, as it ensures that your cookie bars cook evenly. An oven that is too cool can lead to undercooked bars, while an overly hot oven may cause them to burn on the outside while remaining raw in the center.
While the oven is heating, prepare your baking pan. For this recipe, an 8×8-inch or 9×9-inch square baking pan works well. You can choose to grease the pan with butter or line it with parchment paper for easy removal. If using parchment paper, make sure to leave a little overhang on the sides; this will make it easier to lift the cookie bars out of the pan once they are baked.
Mixing Dry Ingredients
In a medium mixing bowl, whisk together the all-purpose flour, baking soda, and salt. Whisking these dry ingredients is important, as it ensures that the baking soda and salt are evenly distributed throughout the flour. This step helps prevent any clumping and ensures that each bite of your cookie bars is perfectly seasoned.
Additionally, the temperature of your ingredients can significantly impact the final product. Make sure that the flour is at room temperature before mixing, as cold ingredients can lead to uneven baking.
Creaming Butter and Sugars
In a large mixing bowl, cream together the softened unsalted butter, granulated sugar, and brown sugar until the mixture is light and fluffy. This process typically takes about 2-3 minutes with an electric mixer. The creaming method is essential for achieving that desirable chewy texture; incorporating air into the butter and sugars will help the cookie bars rise properly.
Once the butter and sugars are well combined, add in the eggs, one at a time, mixing well after each addition. The eggs should be at room temperature as well, as this helps them blend more easily into the butter mixture. After incorporating the eggs, mix in the vanilla extract for added flavor.
Following these preliminary steps will set the foundation for your chewy chocolate chip cookie bars. In the next section, we will continue with the remaining instructions, guiding you through the final stages of preparation to ensure that you achieve cookie bars that are perfectly chewy and irresistibly delicious.
{{image_2}}
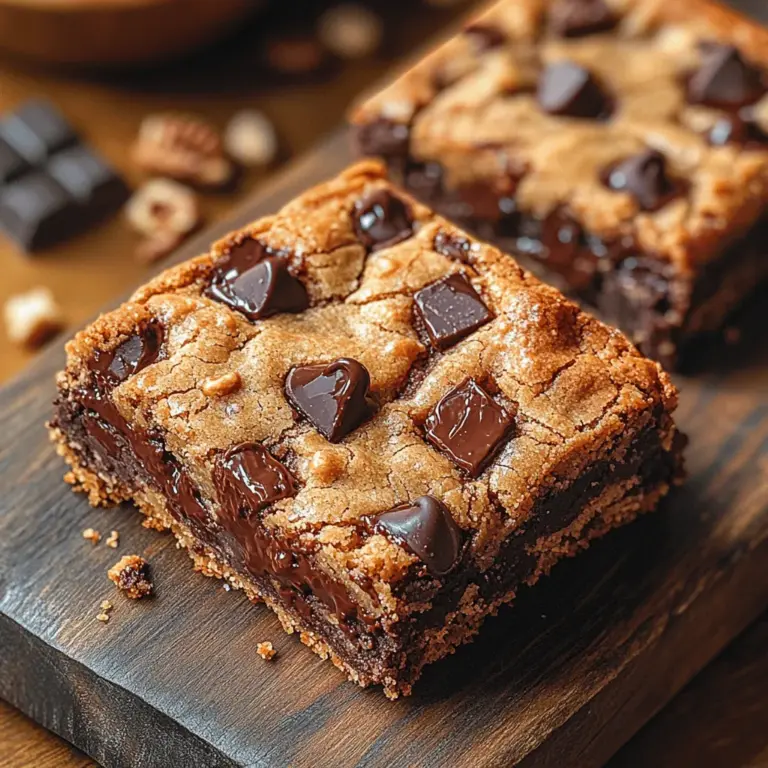
Incorporating Eggs and Vanilla
To create the perfect chewy chocolate chip cookie bars, the incorporation of eggs and vanilla is crucial. Start by adding two large eggs to your mixing bowl. Eggs not only bind the ingredients together but also contribute to the overall texture, making your cookie bars chewy and rich. When incorporating eggs, it’s essential to beat them lightly before adding them to the batter. This ensures an even distribution throughout the mixture.
Tips for Incorporating Eggs Without Deflating the Batter
When mixing your eggs into the batter, use a gentle approach. Stir the eggs in using a spatula or a wooden spoon rather than a whisk, which can introduce too much air and deflate the batter. You want to mix just until you see the eggs incorporated; over-mixing can lead to a denser texture, which isn’t ideal for chewy cookie bars.
The Aromatic Impact of Vanilla Extract on the Final Product
Next, add one teaspoon of high-quality vanilla extract. Vanilla extract doesn’t just add flavor; it enhances the overall aroma of your cookie bars, making them irresistible. Be sure to choose pure vanilla extract for the best results, as artificial versions can lack the depth of flavor you want in your baked goods. Stir the mixture until the eggs and vanilla are fully combined, creating a smooth, cohesive batter.
Combining Wet and Dry Ingredients
Now it’s time to bring together your wet and dry ingredients. If you haven’t already, prepare your dry ingredients by combining flour, baking soda, and salt in a separate bowl. The typical ratio for this recipe is about 2 cups of all-purpose flour, 1 teaspoon of baking soda, and ½ teaspoon of salt.
Explanation of the Folding Technique to Avoid Over-Mixing
To combine the wet and dry ingredients, it’s important to use the folding technique. This method allows you to blend the ingredients without over-mixing, which can develop gluten and result in tough cookie bars. Use a spatula to fold the dry ingredients into the wet mixture: scoop under the wet batter and gently bring it over the dry ingredients. Rotate your bowl as you go, ensuring that all flour pockets are incorporated without vigorous stirring.
Signs of the Right Consistency in the Batter
The right consistency for your cookie bar batter should be thick and slightly sticky, yet it should hold together well. You want it to be scoopable but not runny. If your batter is too dry, you can add a tablespoon of milk to achieve the desired consistency. Once you see a homogenous mixture with no visible flour streaks, you’re ready to move on to the next step.
Folding in Chocolate Chips and Nuts
One of the most exciting parts of making chewy chocolate chip cookie bars is adding your mix-ins. For this recipe, 1 to 1½ cups of semi-sweet chocolate chips are recommended, but feel free to adjust to your preference. You can also fold in ½ cup of chopped nuts, such as walnuts or pecans, for added texture and flavor.
Best Practices for Even Distribution of Mix-Ins
When folding in chocolate chips and nuts, ensure they are evenly distributed throughout the batter. Use the same folding technique as before, being careful not to over-mix. Aim to have chocolate chips and nuts spread throughout, so you get a delightful bite in every piece. If you’re feeling adventurous, consider adding other mix-ins like caramel bits, toffee pieces, or even white chocolate chips for a unique twist.
Customization Options for Flavor Variations
The beauty of cookie bars lies in their versatility. Experiment by adding spices like cinnamon or nutmeg for a warm flavor profile. You can also incorporate citrus zest for a refreshing touch or even a dash of espresso powder to enhance the chocolate flavor. The options are endless, making this recipe a canvas for your creativity.
Baking the Cookie Bars
Once your batter is prepared and your mix-ins are folded in, it’s time to bake. Preheat your oven to 350°F (175°C) and line a 9×13 inch baking pan with parchment paper, allowing some overhang for easy removal after baking.
Optimal Baking Time and Temperature
Pour the batter into the prepared pan, spreading it evenly with a spatula. Bake in the preheated oven for about 25 to 30 minutes. Oven temperatures can vary, so keep an eye on your bars as they bake. The edges should start to turn golden brown, while the center may look slightly underbaked.
Signs That Indicate the Bars Are Fully Baked
To check for doneness, look for a few important signs: the edges should be firm, and the center should not jiggle. If you see golden edges and a set center, it’s time to take them out.
The Importance of the Toothpick Test for Doneness
For an extra measure of assurance, use the toothpick test. Insert a toothpick into the center of the cookie bars; it should come out with a few moist crumbs but not wet batter. Remember, these bars will continue to cook slightly from residual heat after being removed from the oven.
Cooling and Serving Your Cookie Bars
After baking, cooling your cookie bars properly is essential for achieving the best texture and flavor.
Guidelines for Cooling to Achieve the Best Texture
Allow the cookie bars to cool in the pan on a wire rack for about 15 minutes. This initial cooling period helps them set up a bit before transferring them. If you try to cut them too early, they may crumble and fall apart.
Strategies for Easy Removal from the Pan
To remove the bars, lift them out of the pan using the edges of the parchment paper. This method prevents sticking and makes for a clean removal. If you didn’t use parchment paper, run a knife around the edges to loosen them before attempting to lift.
Recommended Cooling Times Before Cutting
Once out of the pan, let the bars cool completely on the wire rack, which may take an additional 30 minutes. This cooling step is crucial, as it allows the chocolate to set and the bars to firm up, making them easier to cut into squares.
Creative Serving Suggestions
Now that your chewy chocolate chip cookie bars are perfectly baked and cooled, it’s time to serve!
Ideas for Serving
For an indulgent experience, serve the bars warm with a scoop of vanilla ice cream on top, drizzled with hot fudge or caramel sauce. Alternatively, pair them with a dollop of whipped cream or Greek yogurt for a lighter option. The contrast of warm cookie bars with cold ice cream creates a delightful treat.
Pairing Suggestions
These cookie bars are delicious on their own, but they also pair wonderfully with beverages. Serve them alongside a glass of cold milk, a cup of coffee, or even a warm cup of tea. The flavor combinations will enhance the overall experience and leave your guests wanting more.
Presentation Tips for Gatherings or Parties
When serving at gatherings or parties, consider cutting the bars into smaller squares for easy sharing. Arrange them on a decorative platter and sprinkle with a light dusting of powdered sugar for an elegant touch. You can also add fresh berries or mint leaves around the edges for a pop of color and freshness.
Conclusion
In summary, making chewy chocolate chip cookie bars at home is a rewarding and enjoyable experience. By carefully incorporating your ingredients, mastering the baking technique, and allowing for proper cooling, you can create a treat that is both delicious and satisfying. Remember to experiment with different mix-ins and flavors to make this recipe uniquely yours.
The joy of homemade chewy chocolate chip cookie bars lies not only in their delightful taste but also in the process of creating them from scratch. So gather your ingredients, invite friends or family to join in, and indulge in the satisfaction of baking and sharing this beloved treat. Whether for a special occasion or a simple dessert after dinner, these cookie bars are sure to impress and delight everyone who tries them.