Crunchy Delight: Crispy Falafel Pita Pockets
Introduction
Falafel, a beloved staple of Middle Eastern cuisine, has gained global popularity for its delightful flavor and satisfying texture. Traditionally made from ground chickpeas or fava beans, this dish is not only delicious but also versatile, allowing it to be enjoyed in various forms. Among the many ways to savor falafel, stuffed into warm pita pockets stands out as a particularly appealing option. The combination of crispy falafel nestled within soft, fluffy pita, paired with fresh vegetables and rich sauces, creates a symphony of tastes and textures that is hard to resist.
The allure of crispy falafel lies not just in its crunchy exterior and soft, flavorful interior, but also in its health benefits. Made primarily from chickpeas, falafel is naturally vegetarian, packed with protein, and high in fiber, making it a nutritious choice for anyone seeking a fulfilling meal. With the growing interest in plant-based diets, this dish has become a favorite among health-conscious eaters and food enthusiasts alike. Each ingredient in the falafel and the accompanying tahini sauce contributes to a well-rounded, wholesome dish that is as good for the body as it is for the soul.
Understanding the Ingredients
At the heart of any falafel recipe are the chickpeas, which serve as the base for this popular dish. Nutritionally, chickpeas are a powerhouse; they are rich in protein, fiber, and essential vitamins and minerals. This combination not only helps to keep you feeling full longer but also supports digestive health and aids in weight management. For the best results in your falafel, it is crucial to start with dried chickpeas that have been soaked overnight. Soaking softens the beans, allowing them to blend smoothly and form a cohesive mixture while also enhancing their digestibility.
In addition to chickpeas, fresh herbs and spices play a pivotal role in crafting the flavor profile of falafel. Parsley and cilantro are commonly used, bringing a burst of freshness that brightens the dish. Meanwhile, spices like cumin and coriander add warmth and complexity, elevating the overall taste experience. The combination of these ingredients not only enhances flavor but also contributes to the numerous health benefits associated with consuming a diet rich in herbs and spices.
Equally important is the tahini sauce, which complements falafel perfectly. Made from ground sesame seeds, tahini is creamy and nutty, providing a rich contrast to the crispy falafel. Nutritionally, tahini is an excellent source of healthy fats, protein, and a variety of vitamins and minerals, including calcium and magnesium. Its versatility extends beyond falafel, allowing it to be used in dressings, dips, and spreads, making it a valuable addition to any kitchen.
Step-by-Step Guide to Preparing Falafel
Preparing the Falafel Mixture
To embark on your falafel-making journey, begin by preparing the falafel mixture. Start by rinsing and draining your soaked chickpeas, ensuring they are free of any excess moisture. Next, transfer them to a food processor along with the fresh herbs, garlic, and spices. The food processor is an essential tool in this process, as it ensures that the ingredients are finely chopped and well-combined without turning them into a paste. The goal is to achieve a coarse texture that will hold together when shaped into balls.
As you blend the ingredients, keep an eye on the consistency. If the mixture feels too dry, a small amount of water can be added to help it bind, but be cautious not to over-process. The perfect falafel mixture should hold together when pressed but still have a bit of texture. Once you achieve this ideal consistency, taste the mixture and adjust the seasoning as necessary. This step is crucial, as the flavors will be more pronounced after cooking.
Forming the Falafel Balls
Once your falafel mixture is ready, it’s time to shape it into balls or patties. To prevent the mixture from sticking to your hands, you may want to moisten your palms slightly. Taking a small portion of the mixture, roll it into a ball about the size of a golf ball. For even cooking, ensure that all your falafel balls are uniform in size.
After shaping the balls, place them on a parchment-lined tray and refrigerate for at least 30 minutes. Chilling the falafel is an important step, as it helps the balls maintain their structure during frying. This process allows the flavors to meld and the ingredients to set, resulting in a more cohesive and flavorful falafel.
Frying the Falafel
When your falafel balls have chilled and firmed up, it’s time to fry them to golden perfection. Heat a deep pot or a heavy skillet with a few inches of oil to a temperature of around 350°F (175°C). A thermometer can be very helpful here to ensure that the oil is at the right temperature, as frying at too low a temperature can result in greasy falafel, while too high can lead to burnt exteriors before the insides are cooked.
Carefully add the falafel balls to the hot oil, being mindful not to overcrowd the pot. Fry in batches if necessary, allowing space for the falafel to float and brown evenly. The cooking time will vary, but typically, 3-4 minutes on each side is sufficient to achieve a crispy exterior without excess oil. Once golden brown, remove the falafel with a slotted spoon and drain them on paper towels to absorb any excess oil.
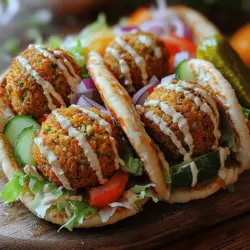
The result of this careful process is crispy falafel that is bursting with flavor and ready to be enjoyed in a warm pita pocket, along with your favorite toppings and sauces. As you prepare to assemble your delightful meal, take a moment to appreciate the journey of transforming simple ingredients into a delicious, nutritious dish that is sure to satisfy.
{{image_2}}
Crafting the Perfect Pita Pockets
Selecting the Right Pita Bread
When it comes to making crispy falafel pita pockets, the choice of pita bread can significantly influence the overall flavor and texture of the dish. Pita bread is available in various types, but the two most popular options are regular white pita and whole wheat pita.
Whole Wheat vs. Regular Pita Bread
Whole wheat pita bread offers a nuttier flavor and a denser texture compared to regular white pita. It is also higher in fiber and nutrients, making it a healthier option for those looking to increase their whole grain intake. On the other hand, regular pita is softer and has a milder taste, which may appeal to those who prefer a more neutral base for their fillings.
Both options can work well for falafel pita pockets, so choose based on your dietary preferences and flavor profiles. Whichever you decide, ensure it is fresh for the best results.
Tips for Warming Pita for Easy Stuffing
Warming pita bread is essential for achieving that perfect, pliable texture that makes stuffing easy. Here are some effective methods:
– Oven Method: Preheat your oven to 350°F (175°C). Wrap the pita bread in aluminum foil and warm it in the oven for about 10 minutes. This method helps maintain moisture while heating.
– Stovetop Method: Heat a non-stick skillet over medium heat. Place the pita directly in the skillet for about 30 seconds on each side until warmed through. This method adds a slight crispness, enhancing the overall texture.
– Microwave Method: If you’re short on time, place the pita on a microwave-safe plate, cover it with a damp paper towel, and microwave for about 15-20 seconds. This method is quick but can sometimes lead to a slightly chewy texture.
By warming the pita bread, you set the stage for easier stuffing and a delightful eating experience.
Ideal Fresh Fillings
Fresh vegetables are not just for decoration; they contribute significantly to the nutritional profile and flavor of your falafel pita pockets. Here’s a breakdown of ideal fillings:
– Lettuce: Romaine or butter lettuce provides a crisp texture and refreshing bite. It is low in calories and high in vitamins A and K.
– Tomatoes: Diced tomatoes add juiciness and vibrancy. They are rich in antioxidants, particularly lycopene, which is beneficial for heart health.
– Cucumbers: Thinly sliced cucumbers offer crunch and hydration. They are low in calories and high in vitamins and minerals.
– Onions: Red onions or green onions can add a sharp bite. They are great sources of antioxidants and have anti-inflammatory properties.
Consider adding optional ingredients like pickles or pickled vegetables, which introduce a tangy crunch that contrasts beautifully with the crispy falafel.
Making the Tahini Sauce
Step-by-Step Instructions for Preparing the Sauce
A well-made tahini sauce can elevate your falafel pita pockets, adding creamy richness and a nutty flavor. Here’s how to prepare it:
1. Ingredients:
– ½ cup tahini
– ¼ cup water (adjust as needed)
– 2 tablespoons lemon juice
– 1 garlic clove, minced
– Salt to taste
2. Combine Ingredients: In a mixing bowl, whisk together the tahini, minced garlic, and lemon juice until smooth.
3. Add Water: Gradually add water while whisking until you reach your desired consistency. The sauce should be pourable but not too runny.
4. Season: Taste and add salt as needed. You can also add a pinch of cayenne pepper for an extra kick.
5. Adjust for Flavor: If you prefer a more citrusy flavor, add a touch more lemon juice. For a deeper flavor, consider adding a teaspoon of cumin or a dash of paprika.
Importance of Balancing Flavors with Lemon Juice and Garlic
The combination of lemon juice and garlic is crucial for achieving a harmonious balance in your tahini sauce. Lemon juice adds brightness and acidity, which helps cut through the richness of the tahini. Garlic contributes a pungent depth that enhances the overall flavor profile. Adjust these ingredients according to your taste preferences for a personalized touch.
Adjusting Consistency for the Perfect Drizzle
The consistency of your tahini sauce can greatly affect its usability. For drizzling, aim for a slightly thinner sauce. If it’s too thick, add more water, one tablespoon at a time, until you achieve the desired consistency. A good tahini sauce should flow easily but still hold its shape when drizzled.
Assembling the Crunchy Falafel Pita Pockets
Techniques for Stuffing the Pita Pockets
Stuffing your pita pockets correctly is key to enjoying every bite. Here’s how to assemble them:
1. Prepare Your Ingredients: Have your crispy falafel, fresh vegetables, and tahini sauce ready.
2. Open the Pita: Carefully slice the pita in half to create a pocket. Be gentle to avoid tearing the bread.
3. Layer Strategically: Start by placing a layer of lettuce inside the pita. This helps create a barrier that prevents the pita from becoming soggy.
4. Add Falafel: Place 2-3 falafel balls into the pocket, depending on size. They should be placed centrally to allow for additional fillings.
5. Top with Vegetables: Add the diced tomatoes, cucumbers, and onions. If using pickles, add them last for a crunchy finish.
6. Drizzle with Tahini Sauce: Finally, drizzle your prepared tahini sauce over the toppings. This not only adds flavor but also helps bind the ingredients together.
Tips for Layering Ingredients for Optimal Flavor in Each Bite
For the best flavor experience in every bite, layer your ingredients thoughtfully:
– Begin with the crispest ingredients at the bottom (like lettuce) to maintain structure.
– Add falafel in the center for a hearty bite.
– Disperse vegetables evenly to ensure each mouthful contains a mix of flavors and textures.
– Finish with a generous drizzle of tahini sauce to enhance the overall taste.
Serving Suggestions and Presentation Ideas
Presentation can make a significant difference in the appeal of your falafel pita pockets. Here are some serving suggestions:
– Platter Arrangement: Arrange the pita pockets on a large platter, garnished with extra lettuce and slices of lemon for added color.
– Dipping Sauces: Serve alongside extra tahini sauce or a spicy harissa for those who enjoy a kick.
– Garnishes: Consider garnishing with fresh herbs like parsley or cilantro for a touch of freshness.
Creating an appealing platter not only enhances the dining experience but also showcases the vibrant colors and textures of your ingredients.
Nutritional Insights
Analyzing the Overall Nutritional Profile of the Falafel Pita Pockets
Crispy falafel pita pockets are not only delicious but also packed with nutrients. Here’s a breakdown of their nutritional profile:
– Protein: Falafel is primarily made from chickpeas, which are an excellent source of plant-based protein, essential for muscle repair and growth.
– Fiber: The combination of chickpeas and fresh vegetables provides a good amount of dietary fiber, promoting digestive health and keeping you feeling full longer.
– Vitamins and Minerals: Fresh fillings like tomatoes and cucumbers contribute essential vitamins such as A, C, and K, along with minerals like potassium and magnesium.
Caloric Breakdown per Serving
On average, a falafel pita pocket contains approximately 300-400 calories, depending on the size of the pita and the quantity of fillings. This makes it a satisfying yet healthy meal option.
– Falafel Balls: About 150-200 calories for 2-3 balls.
– Pita Bread: Approximately 150-200 calories.
– Fillings and Sauce: Roughly 50-100 calories, depending on your choice of vegetables and sauce.
Benefits of a Vegetarian Meal Packed with Protein and Fiber
Choosing falafel pita pockets as a meal provides a range of health benefits. They are a wholesome vegetarian option that offers a balance of protein, fiber, and essential nutrients. Including more plant-based meals in your diet can contribute to better heart health, weight management, and overall wellness.
Conclusion
Crispy falafel pita pockets are a delightful fusion of flavors and textures that can satisfy any craving while providing a nutritious meal option. With their versatility, they can be tailored to suit various dietary preferences, making them a great choice for everyone.
Taking the time to make these pita pockets at home allows you to customize the ingredients to your liking, ensuring a delicious experience every time. Not only are you treating yourself to a healthy meal, but you are also participating in a culinary tradition that has cultural significance in many parts of the world.
Whether enjoyed as a quick lunch, a hearty dinner, or a shareable appetizer, falafel pita pockets bring joy to the table. So gather your ingredients, invite a friend, and discover the joy of sharing food through this vibrant recipe. Happy cooking!