Choco-Banana Bliss Pops: A Deliciously Nutritious Treat
In recent years, the demand for healthy snacks and desserts has surged, driven by an increasing awareness of nutrition and wellness. As families and individuals alike look for ways to indulge their sweet tooth without compromising their health, innovative recipes are emerging that expertly blend flavor and nutrition. Among these delightful creations are Choco-Banana Bliss Pops, a delectable treat that stands out for its simplicity and wholesome ingredients. These pops not only satisfy cravings but also deliver a range of health benefits, making them an ideal choice for various audiences—from families seeking quick snacks to health-conscious individuals and dessert lovers.
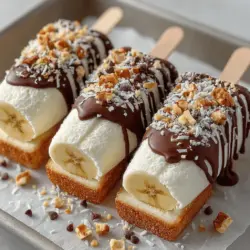
Choco-Banana Bliss Pops are a perfect embodiment of indulgence meeting health. By combining ripe bananas with Greek yogurt, dark chocolate, and other nutritious ingredients, this recipe creates a delightful snack that can be enjoyed any time of day. Whether you’re looking for an afternoon pick-me-up or a sweet treat after dinner, these pops provide a guilt-free way to enjoy dessert while reaping the nutritional benefits of their components.
Understanding the Ingredients
To truly appreciate the Choco-Banana Bliss Pops, it’s essential to understand the health benefits of the key ingredients that come together to create this nutritious snack.
1. Ripe Bananas: At the heart of this recipe are ripe bananas, which contribute not only natural sweetness but also a wealth of nutrition. Bananas are rich in potassium, vital for heart health and muscle function, and they provide dietary fiber, promoting digestive health and keeping you feeling full longer. Their natural sugars make them a perfect base for popsicles, eliminating the need for added sweeteners.
2. Greek Yogurt: This ingredient is a powerhouse of protein, which is crucial for muscle repair and growth. Greek yogurt is known for its probiotic content, supporting gut health and enhancing digestion. Additionally, it offers a creamy texture that complements the bananas perfectly. When choosing yogurt, opt for plain varieties to avoid added sugars; you can always customize the flavor later if desired.
3. Dark Chocolate Chips: The addition of dark chocolate chips not only elevates the flavor profile of Choco-Banana Bliss Pops but also infuses them with antioxidants. Dark chocolate, especially those with a high cacao content, has been associated with various health benefits, including improved heart health and reduced inflammation. The richness of dark chocolate provides a satisfying indulgence, making these pops a treat you can feel good about.
4. Coconut Oil: This ingredient plays a crucial role in achieving the perfect melting consistency for the chocolate coating. Rich in medium-chain triglycerides (MCTs), coconut oil has been praised for its potential benefits in boosting metabolism and providing a quick source of energy. Using coconut oil in your chocolate mixture not only enhances the flavor but also ensures a smooth coating that adheres beautifully to the bananas.
5. Crushed Nuts: For an added crunch and nutritional boost, crushed nuts are a fantastic option. Nuts are rich in healthy fats, protein, and various vitamins and minerals. They add texture to the pops and enhance the overall flavor. Almonds, walnuts, or pecans are excellent choices, each offering unique health benefits and taste.
6. Shredded Coconut (Optional): To elevate the tropical flavor of the Choco-Banana Bliss Pops, consider adding shredded coconut. This ingredient not only adds a delightful chewiness but also provides additional fiber and healthy fats. Whether you opt for sweetened or unsweetened shredded coconut, it can enhance the visual appeal and flavor profile of your pops.
With a clear understanding of the health benefits each ingredient brings to the table, it’s time to delve into the process of creating these blissful treats.
Step-by-Step Instructions for Choco-Banana Bliss Pops
Creating Choco-Banana Bliss Pops is a straightforward process, making it perfect for both novice and experienced cooks. Below are the initial steps to get you started on your delicious journey.
Preparing the Bananas
The first step in making Choco-Banana Bliss Pops is to prepare the bananas. Begin by selecting ripe bananas that are evenly yellow with a few brown spots—this indicates they are sweet and ready for the recipe.
1. Peeling the Bananas: Carefully peel each banana, ensuring that you remove all the skin. Ripe bananas are soft and can be easily handled, so take care not to mash them during this process.
2. Cutting the Bananas: Once peeled, slice the bananas into thick pieces, approximately 1 to 1.5 inches in length. This size is ideal for pops, as it provides a good balance between bite-size portions and stability when frozen.
3. Inserting Popsicle Sticks: After cutting the bananas, take popsicle sticks and insert them into one end of each banana piece. Ensure that the sticks are inserted deep enough to provide stability while eating. Positioning the sticks correctly is crucial; they should be inserted straight and centered to prevent the bananas from toppling over when frozen.
Freezing the Bananas
Once your bananas are prepared, it’s time to freeze them. This step is essential for achieving the perfect texture and stability in your final pops.
1. Arranging the Bananas: Place the banana pieces on a parchment-lined baking sheet, ensuring that they are spaced apart to prevent sticking. This step allows for even freezing and easy removal later.
2. Freezing Process: Transfer the baking sheet to the freezer and allow the bananas to freeze for at least two hours or until they are solid. This freezing time is crucial, as it helps the pops maintain their shape during the coating and serving process.
Making the Yogurt Coating
While the bananas are freezing, you can prepare the yogurt coating, which will provide a creamy, tangy layer that contrasts beautifully with the sweetness of the bananas.
1. Achieving the Perfect Yogurt Mixture: In a mixing bowl, combine Greek yogurt with a sweetener of your choice, such as honey or maple syrup. The amount of sweetener will depend on your taste preference and the ripeness of your bananas.
2. Flavoring Options: If you wish to add a little extra flavor, consider incorporating vanilla extract or a pinch of cinnamon into the yogurt mixture. These additions can elevate the overall taste and make the pops even more delightful.
3. Mixing Until Smooth: Whisk the yogurt and sweetener together until you achieve a smooth and creamy consistency. This mixture will coat the frozen banana pieces beautifully, providing both flavor and a nutritious layer.
Now that you have prepared the bananas for freezing and made the yogurt coating, you’re well on your way to creating Choco-Banana Bliss Pops. Stay tuned for the next steps, where we will explore the chocolate coating process and how to finish your delightful pops!
{{image_2}}
Coating the Bananas
Once you’ve sliced the bananas into bite-sized pieces, the next step is to coat them in yogurt. This not only adds flavor but also provides a creamy texture that pairs beautifully with the chocolate. To ensure an even yogurt coating, dip each banana slice into the yogurt mixture, allowing it to be fully coated.
Techniques for Ensuring an Even Yogurt Coating and Managing Excess
To achieve a perfect coating, consider the following techniques:
1. Using a Fork: Skewer each banana slice with a fork before dipping. This allows you to easily turn the banana in the yogurt, covering all sides without getting your hands messy.
2. Tapping Off Excess: After dipping, gently tap the fork against the side of the bowl to remove any excess yogurt. This prevents drips and helps create a more even layer.
3. Chilling Between Coats: If you prefer a thicker yogurt layer, you can freeze the yogurt-coated bananas for about 15 minutes before applying a second layer of yogurt. This method helps the second layer adhere better.
Preparing the Chocolate Coating
The chocolate coating is where the magic truly happens. Deciding to use dark or milk chocolate depends on your personal preference, but dark chocolate is often favored for its rich flavor and health benefits.
Importance of Using a Microwave-Safe Bowl and Proper Melting Techniques
To melt the chocolate safely and effectively, follow these guidelines:
1. Choose the Right Bowl: Always use a microwave-safe bowl to prevent any melting mishaps. Glass or ceramic bowls are excellent choices, while plastic can sometimes warp under heat.
2. Melting Process: Break the chocolate into small pieces for even melting. Microwave on medium power in increments of 30 seconds, stirring in between. This technique prevents the chocolate from scorching. Once you see just a few unmelted pieces, stir until fully melted, as residual heat will continue to melt the chocolate.
Dipping the Yogurt-Coated Bananas in Chocolate
After the yogurt-coated bananas have frozen for a bit, it’s time to dip them into the melted chocolate.
Tips for Achieving a Smooth Chocolate Layer and Managing Excess
1. Quick Dipping: Dip each yogurt-coated banana slice into the melted chocolate, ensuring it is fully submerged. Quickly lift it out and let any excess chocolate drip back into the bowl.
2. Use a Cooling Rack: Place the dipped bananas on a cooling rack set over a baking sheet. This allows excess chocolate to drip off and prevents them from sitting in a puddle of melted chocolate.
3. Smooth Finish: If you notice any clumps of chocolate, use a spatula to smooth them out or gently shake the cooling rack to let the chocolate settle.
Adding Toppings
Toppings not only enhance the flavor but also add a visual appeal to your Choco-Banana Bliss Pops.
Creative Ways to Use Toppings for Visual and Textural Enhancement
1. Nut Variations: Sprinkle chopped nuts (like almonds, walnuts, or pistachios) immediately after dipping in chocolate. The crunch complements the creamy banana and yogurt base.
2. Coconut Flakes: Unsweetened coconut flakes add a tropical twist. Roll the chocolate-dipped bananas in the coconut for a deliciously chewy texture.
3. Sprinkles and Cinnamon: For a fun, festive touch, use colorful sprinkles. Alternatively, a light dusting of cinnamon or cocoa powder can provide an elegant finish.
Final Freezing Step
The final freeze is crucial for setting the chocolate coating and ensuring your Choco-Banana Bliss Pops hold their shape.
Importance of the Second Freeze for Setting the Chocolate Coating
After adding toppings, place the bananas back in the freezer for at least 30 minutes. This second freeze allows the chocolate to harden completely, ensuring each bite is a delightful combination of creamy banana, tangy yogurt, and rich chocolate.
Serving Suggestions for Choco-Banana Bliss Pops
Once your pops are fully frozen and set, it’s time to showcase them.
Presentation Ideas for Gatherings and Parties
1. On a Platter: Arrange the pops on a decorative platter for a visually appealing display. You can garnish with fresh fruit or mint leaves for an extra touch.
2. In a Jar with Ice: For a fun and unique presentation, place the pops upright in a glass jar filled with ice. This keeps them cold and adds a playful element to your serving style.
Fun Serving Styles
Consider pairing your Choco-Banana Bliss Pops with complementary beverages or snacks. They go wonderfully with:
– Hot Chocolate or Milk: Serve with a steaming cup of hot chocolate or a glass of cold milk for a nostalgic treat.
– Fruit Smoothies: Pair with fruit smoothies for a refreshing snack or dessert option.
Nutritional Insights and Benefits
These Choco-Banana Bliss Pops not only satisfy your sweet tooth but also offer various health benefits.
Breakdown of the Nutritional Content per Serving
Each pop (depending on size) typically contains around:
– Calories: 100-150
– Protein: 2-3g
– Fat: 5-7g (depending on chocolate and toppings)
– Carbohydrates: 15-20g
Health Benefits Associated with Each Primary Ingredient
– Bananas: Packed with potassium and fiber, bananas support heart health and digestion.
– Yogurt: A great source of probiotics, yogurt aids in gut health and boosts immunity. Opting for low-fat or Greek yogurt can increase protein content.
– Chocolate: Dark chocolate (in moderation) is rich in antioxidants and can improve heart health.
Discuss How These Pops Fit into a Balanced Diet
These pops make a perfect guilt-free dessert for those seeking a healthier lifestyle. They are a great way to enjoy a sweet treat with the added benefits of fruit and yogurt, making them suitable for various dietary plans.
Conclusion
Choco-Banana Bliss Pops are a delightful and easy-to-make dessert that caters to both taste and health. Their versatility in flavors and toppings allows you to customize them according to your preferences, making them perfect for any occasion. Whether you’re serving them at a party or enjoying them as a personal treat, these pops are sure to please.
Experiment with different yogurt flavors, types of chocolate, and an array of toppings to discover your favorite combinations. With these tips and tricks, you can create a fun, nutritious dessert that satisfies cravings without the guilt. Enjoy the process, and let your creativity shine while making Choco-Banana Bliss Pops!