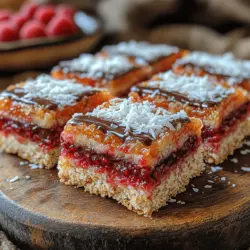
In the world of delectable desserts, Raspberry Coconut Ribbon Bars stand out as a refreshing and healthy treat that beautifully combines the tropical flavor of coconut with the tartness of fresh raspberries. These bars are not only visually stunning but also easy to make, making them an ideal choice for gatherings or simply a delightful snack at home. With their vibrant colors and rich textures, they are sure to impress your family and friends while satisfying your sweet tooth.
This article provides a comprehensive guide to creating these bars, including a detailed recipe, insights into the ingredients, and tips for perfecting your dessert experience. Whether you are a seasoned baker or a beginner in the kitchen, you’ll find that Raspberry Coconut Ribbon Bars are within your reach. Let’s dive into the delightful world of these bars and explore what makes them truly special.
Understanding the Ingredients
Exploring the Coconut Base
The foundation of any great dessert is its ingredients, and the coconut base of Raspberry Coconut Ribbon Bars is no exception. Here’s a closer look at the key components:
– Importance of Unsweetened Shredded Coconut: Unsweetened shredded coconut is a staple in this recipe. It provides the essential tropical flavor and texture that defines the coconut layer of the bars. Opting for unsweetened coconut ensures that your dessert isn’t overly sweet, allowing the natural flavors of the raspberries to shine through. Plus, it’s a fantastic source of healthy fats and fiber, contributing to a satisfying dessert that won’t leave you feeling guilty.
– Benefits of Almond Flour in Gluten-Free Baking: Almond flour is another crucial ingredient in the coconut base. It not only adds a nutty flavor but also serves as a gluten-free alternative to traditional flour. Almond flour is rich in protein, healthy fats, and vitamins, making it a nutritious choice for those with gluten sensitivities. Its fine texture helps create a moist and tender crumb in your bars.
– Natural Sweeteners: Honey vs. Maple Syrup: When it comes to sweetening your coconut base, both honey and maple syrup are excellent options. Honey provides a distinct floral flavor and has natural antibacterial properties, while maple syrup offers a deeper, more complex sweetness. Choosing between the two often depends on personal preference or dietary restrictions. Regardless of which you select, these natural sweeteners will enhance the overall flavor without overpowering the dish.
– The Role of Coconut Oil in Texture and Flavor: Coconut oil is another key player in the coconut base. It lends a rich flavor and helps bind the ingredients together, creating a smooth and cohesive texture. Its high-fat content also contributes to the bars’ overall moisture, ensuring they don’t dry out during baking. For an added twist, you can use refined coconut oil for a neutral taste or unrefined coconut oil for a more pronounced coconut flavor.
– Flavor Enhancement with Vanilla Extract and the Necessity of Salt: A splash of vanilla extract elevates the flavors of the coconut base, creating a more rounded and flavorful dessert. Additionally, a pinch of salt is essential; it enhances sweetness and balances the flavors, ensuring your bars are deliciously satisfying.
Diving into the Raspberry Filling
Now that we have a solid understanding of the coconut base, let’s explore the raspberry filling that brings a burst of color and flavor to the bars.
– Nutritional Benefits of Fresh Raspberries: Raspberries are not just a beautiful addition to the bars; they are packed with nutrients. They are low in calories but high in fiber, vitamins C and K, and antioxidants. These small berries contribute to heart health, aid digestion, and provide a refreshing tartness that perfectly balances the sweetness of the coconut.
– Sweetening Options: Honey vs. Agave Syrup: Just like the coconut base, you have choices when it comes to sweetening the raspberry filling. Honey adds a rich flavor, while agave syrup has a milder taste and a lower glycemic index, making it a suitable option for those managing blood sugar levels. Experiment with both to find the perfect balance of sweetness for your taste buds.
– The Role of Lemon Juice in Flavor Balancing: A splash of lemon juice is crucial in the raspberry filling. It brightens the flavor, enhances the natural tartness of the raspberries, and helps to cut through the sweetness of the coconut base. The acidity from the lemon juice creates a harmonious balance that elevates the entire dessert.
– Cornstarch as a Thickening Agent and Its Alternatives: Cornstarch is commonly used in the raspberry filling to create a thicker, more luscious texture. It helps set the filling, preventing it from being too runny when sliced. For those looking for alternatives, arrowroot powder or tapioca starch can also be effective thickening agents, providing a similar result without the use of cornstarch.
– Importance of Vanilla Extract in Enhancing Raspberry Flavor: Just as it does in the coconut base, vanilla extract plays a vital role in the raspberry filling. It enhances the berry’s natural flavors, creating a more complex and enjoyable taste. Using high-quality vanilla extract will yield the best results, so be sure to choose a pure variety over imitation.
The Chocolate Topping
No dessert is complete without a luscious topping, and the chocolate layer on Raspberry Coconut Ribbon Bars adds an indulgent finish to the treat.
– Choosing the Right Dark Chocolate Chips: When selecting chocolate chips for the topping, opt for high-quality dark chocolate with at least 70% cocoa content. This ensures a rich, deep flavor that complements the sweetness of the coconut and the tartness of the raspberries. Dark chocolate is also loaded with antioxidants, making it a healthier choice compared to milk chocolate.
– The Role of Coconut Oil in Achieving a Smooth Topping: Adding a small amount of coconut oil to the melted chocolate helps achieve a smooth, glossy finish. It thins the chocolate slightly, making it easier to spread and ensuring it sets evenly on the bars. The coconut oil also enhances the chocolate flavor, tying all the components of the dessert together.
– Tips for Melting Chocolate Without Burning: Melting chocolate can be tricky, as it is sensitive to heat. To avoid burning, use a double boiler or a microwave on low power, stirring frequently. If using the microwave, heat in short intervals, checking every 15-20 seconds until melted. This careful approach ensures a silky-smooth chocolate topping that will elevate your Raspberry Coconut Ribbon Bars.
Step-by-Step Preparation
Now that we’ve explored the key ingredients, it’s time to get into the step-by-step preparation of these delightful bars.
Preparing the Coconut Base
– Preheating the Oven: Importance of Temperature Control: Begin by preheating your oven to 350°F (175°C). Preheating is crucial for achieving even cooking and helps the coconut base rise properly, creating a delightful texture.
– Properly Lining the Baking Pan for Easy Removal: Line an 8×8 inch (20×20 cm) baking pan with parchment paper, leaving some overhang on the sides. This will make it easy to lift the bars out of the pan once they are baked and cooled, ensuring a clean slice without crumbling.
– Mixing Techniques for the Perfect Coconut Base: In a mixing bowl, combine the unsweetened shredded coconut, almond flour, your chosen sweetener, coconut oil, vanilla extract, and a pinch of salt. Use a fork or spatula to mix until the ingredients are well incorporated and form a crumbly dough. The mixture should hold together when pressed; if it feels too dry, add a bit more coconut oil or sweetener until the desired consistency is reached.
– Baking Time and Signs of Doneness: Spread the coconut mixture evenly in the prepared baking pan, pressing it down firmly. Bake in the preheated oven for about 15-20 minutes or until the edges are golden brown. Keep an eye on the bars as they bake, as oven temperatures may vary. A good sign of doneness is a lightly golden top, which indicates that the coconut is toasted and the base is ready for the raspberry filling.
Crafting the Raspberry Filling
With the coconut base cooling, it’s time to prepare the raspberry filling. This step is crucial, as it provides the vibrant, tangy contrast to the sweet coconut layer.
– Cooking the Raspberries: In a small saucepan over medium heat, combine fresh raspberries, your chosen sweetener, lemon juice, and a pinch of salt. Gently simmer the mixture, allowing the raspberries to break down and release their juices. This process should take about 5-7 minutes.
– Thickening the Mixture with Cornstarch: Once the raspberries are soft and juicy, mix the cornstarch with a tablespoon of cold water in a small bowl to create a slurry. Gradually add the slurry to the raspberry mixture while stirring continuously. This will help thicken the filling, giving it a luscious texture. Continue cooking for an additional 2-3 minutes until the mixture has thickened considerably. Remove from heat and stir in a splash of vanilla extract for added flavor.
From here, you will layer the raspberry filling on top of the cooled coconut base, followed by the rich chocolate topping. Each step builds upon the last, creating a deliciously harmonious dessert experience that is sure to please any crowd.
Stay tuned for the next part of this article, where we will cover the assembly of the bars, the chocolate topping process, and additional tips for serving and storing your Raspberry Coconut Ribbon Bars.
{{image_2}}
Cooking Techniques for Achieving the Right Consistency
To create the perfect Raspberry Coconut Ribbon Bars, achieving the right consistency in both the raspberry filling and the coconut base is essential. Start by ensuring that your coconut oil is melted but not too hot, as this could affect the texture of your base. When combining the dry ingredients, such as almond flour and shredded coconut, use a whisk to incorporate air and ensure even distribution. This step is critical for creating a light and fluffy texture in the finished product.
When preparing the raspberry filling, you want it to be thick enough to hold its shape without being overly jam-like. To achieve this, cook the raspberries over medium heat, allowing them to release their juices while gently mashing them with a fork. This method retains some of the fruit’s texture, giving your bars a delightful bite. Avoid overcooking the filling, as this can lead to a runny consistency that may not set properly.
Tips for Mashing Raspberries Without Losing Texture
Mashing raspberries requires a gentle touch to preserve their natural texture. Begin by selecting ripe, fresh raspberries, as they will be easier to mash and will yield the best flavor. Instead of using a standard masher, try using a fork or a potato masher, which allows for more control. Lightly press down on the berries, rotating the fork to break them apart without completely pulverizing them. This technique will give your raspberry filling a more appealing, chunky consistency, enhancing the overall texture of your bars.
Cooling Methods for Optimal Filling Thickness
Once your raspberry filling is cooked, it needs to cool to achieve the right thickness. To speed up the cooling process, transfer the filling to a shallow dish. This allows for faster heat dissipation, ensuring that it thickens appropriately. Once the filling has cooled to room temperature, consider placing it in the refrigerator for 15 to 30 minutes before assembling. This extra cooling step will help the filling set better when layered with the coconut base.
Assembling the Bars
Techniques for Pouring and Spreading Raspberry Filling
After preparing your coconut base and raspberry filling, it’s time to assemble the bars. Start by ensuring the coconut base is evenly pressed into the bottom of your prepared baking dish. When pouring the raspberry filling over the base, use a spatula to gently spread it out. Pour the filling in the center and work your way outwards to avoid disrupting the coconut layer underneath. This method minimizes any mixing and keeps the layers distinct.
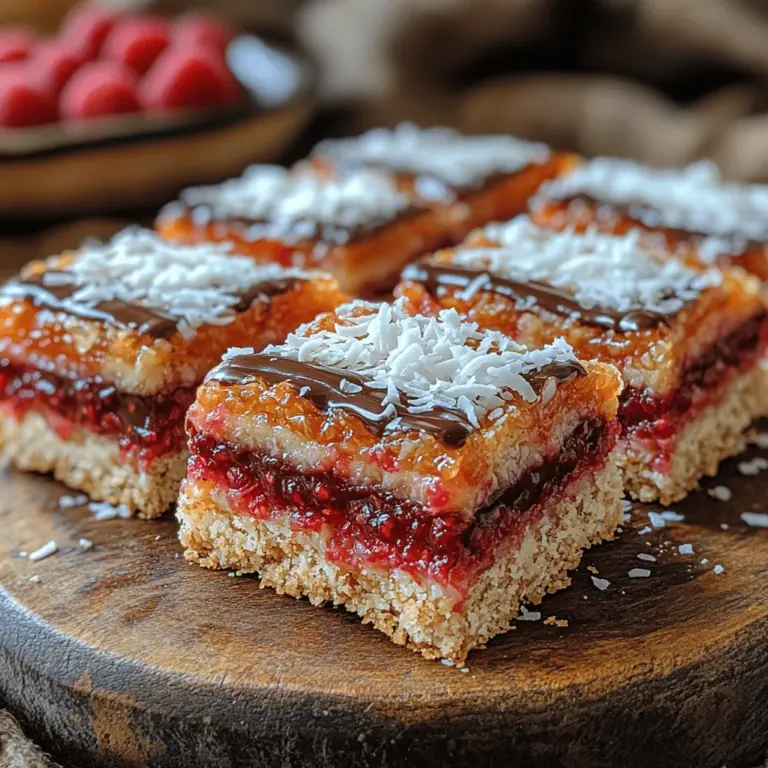
Creating Decorative Swirls for Visual Appeal
To add a touch of artistry to your Raspberry Coconut Ribbon Bars, consider creating decorative swirls with the raspberry filling. Using a skewer or the tip of a knife, gently swirl the filling into the coconut layer. Be careful not to mix the layers too much; the goal is to create a beautiful marbled effect that enhances the visual appeal of your dessert. This simple technique can elevate the dish, making it look professional and inviting.
Importance of Refrigeration in Setting the Layers
Once you’ve assembled your bars, refrigeration is crucial for setting the layers properly. Allow the assembled bars to chill in the refrigerator for at least 2 hours, or until the filling is firm to the touch. This chilling period ensures that the raspberry filling binds well with the coconut base, making it easier to cut into perfect bars once set. If time allows, chilling overnight is even better, as it allows the flavors to meld together beautifully.
Making the Chocolate Topping
Best Practices for Melting Chocolate in the Microwave
For the chocolate topping, the melting process should be done carefully to avoid burning the chocolate. Start by chopping your chocolate into even pieces to ensure uniform melting. Place the chocolate in a microwave-safe bowl and heat it in 30-second intervals, stirring between each interval. This method allows you to monitor the melting process closely and prevents overheating. Stop microwaving when the chocolate is mostly melted, and stir until smooth; residual heat will complete the melting process.
How to Achieve an Artistic Drizzle or Topping
Once your chocolate is melted and smooth, it’s time to create that eye-catching drizzle. Using a spoon, lift some chocolate and let it fall back into the bowl, allowing it to drizzle onto the bars. For a more controlled drizzle, you can use a piping bag or a zip-top plastic bag with a corner snipped off. This technique allows you to create fine lines or patterns, adding an artistic touch to your bars. Be creative – making zigzags, dots, or concentric circles can enhance the visual appeal.
Alternatives to Piping Bags for Chocolate Decoration
If you don’t have a piping bag on hand, there are several alternatives you can use for decorating with chocolate. A clean, small squeeze bottle can work well for drizzling chocolate. Alternatively, you can use a plastic sandwich bag by cutting a very tiny hole in one corner. These methods provide flexibility and allow you to achieve a professional look without specialized equipment.
Chilling and Serving
The Importance of Chilling
Chilling your Raspberry Coconut Ribbon Bars is essential for both texture and flavor development. As the bars chill, the chocolate topping will harden, creating a satisfying contrast with the chewy coconut base and smooth raspberry filling. Additionally, chilling allows the flavors to meld, enhancing the overall taste of the dessert. It’s important to give the bars ample time to chill in the refrigerator, generally around 2-4 hours, depending on your setup.
Recommended Chilling Times for the Best Results
For optimal results, aim for at least 2 hours of refrigeration after assembling the bars. If you have the time, allowing them to chill overnight will yield the best texture and flavor. This extended chilling time ensures that the raspberry filling is fully set and that each slice holds its shape beautifully.
Serving Suggestions
Creative Ways to Present Raspberry Coconut Ribbon Bars
When it comes to serving Raspberry Coconut Ribbon Bars, presentation is key. Consider cutting the bars into uniform squares or rectangles for a clean look. Arrange them on a decorative platter or cake stand for an inviting display. For an extra touch, serve them alongside fresh raspberries or a dollop of whipped cream to accentuate the flavors.
Garnishing Ideas to Enhance Visual Appeal
Enhancing the visual appeal of your bars can be as simple as adding garnishes. A sprinkle of shredded coconut or a dusting of powdered sugar can add a beautiful finishing touch. You could also consider fresh mint leaves for a pop of color and an aromatic note that complements the coconut and raspberry flavors.
Pairing Suggestions with Beverages or Other Desserts
These Raspberry Coconut Ribbon Bars pair wonderfully with various beverages and desserts. For a refreshing option, serve them with a chilled glass of coconut water or iced herbal tea. For coffee lovers, a rich espresso or a creamy latte would beautifully complement the bars’ sweetness. If you want to create a dessert platter, consider pairing them with a light cheesecake or fruit sorbet for a delightful variety of textures and flavors.
Nutritional Benefits
Understanding the Health Aspects
Raspberry Coconut Ribbon Bars are not only delicious but also provide several nutritional benefits. The main ingredients, including raspberries, coconut, and almond flour, contribute to a wholesome treat. Raspberries are rich in antioxidants, vitamins, and fiber, promoting overall health and wellness. Coconut adds healthy fats, while almond flour is a great source of protein and nutrients, making these bars suitable for various dietary needs.
Benefits of Using Natural Sweeteners Over Refined Sugars
Using natural sweeteners in your Raspberry Coconut Ribbon Bars instead of refined sugars improves their nutritional profile significantly. Natural sweeteners like maple syrup or honey provide essential minerals and vitamins, which are often stripped away during the refining process of regular sugars. These alternatives not only enhance the flavor of your bars but also offer a more balanced source of energy.
The Role of Healthy Fats from Coconut Oil and Almond Flour
The inclusion of coconut oil and almond flour in this recipe ensures that you’re incorporating healthy fats into your diet. Coconut oil is known for its medium-chain triglycerides (MCTs), which can provide quick energy and support metabolic health. Almond flour, being rich in monounsaturated fats, is heart-healthy and adds a satisfying texture to the bars. These healthy fats contribute to satiety, making these bars a more nourishing snack option.
Conclusion
Raspberry Coconut Ribbon Bars are more than just a treat; they are a delightful combination of flavors and textures that cater to various dietary preferences. With their easy preparation and wholesome ingredients, these bars make a perfect addition to any dessert table or a refreshing snack anytime. By following the steps outlined in this article, you can create a deliciously satisfying dessert that is both visually appealing and packed with nutrition, sure to please family and friends alike. Enjoy these bars as a guilt-free indulgence, knowing you are treating yourself to something wholesome and delicious.